


If you’re bored of carving same smiling pumpkins year after year, this fun DIY Book Page Pumpkin will shake up your Halloween home decor. It is an excellent fall craft for the book lovers who are looking for creating something fun and fancy this fall. This eco-friendly pumpkin is made from old books that were all set to hit the dumpster. It also shows you how to celebrate the spookiest festival of the year in an environmentally-friendly way.
Materials needed to make your own Book Page Pumpkin:
- Book (each pumpkin is made from an entire book)
- Scissors
- Exacto Knife {this is optional}
- Piece of paper
- Pencil
- Glue Gun and Glue stick
Step-by-step instructions to create DIY Book Page Pumpkin:
Step 1: You need to collect all the materials together before beginning the process. After that, you need to remove the front and back cover of the book, as they are not required for this craft project.
Step 2: Now is the time to take a blank piece of paper and fold it in half. After that, draw half of a pumpkin shape using the edge of the creased line.

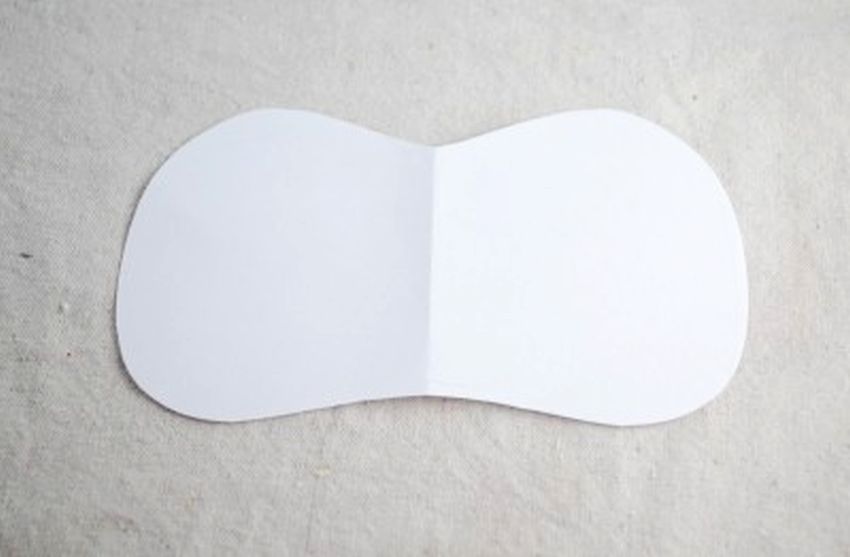
Step 3: Using scissors, you have to cut out your pumpkin shape from the piece of paper. This will function as the template you would require to create the pumpkin shape out of your entire book. You also need to keep in mind the shape of the book you are using in this project.
Don’t worry if the shape is not perfect – pumpkins aren’t perfect anyway. One thing you need to keep in mind is that the bottom line should be more straight so that the pumpkin can easily sit on the table.

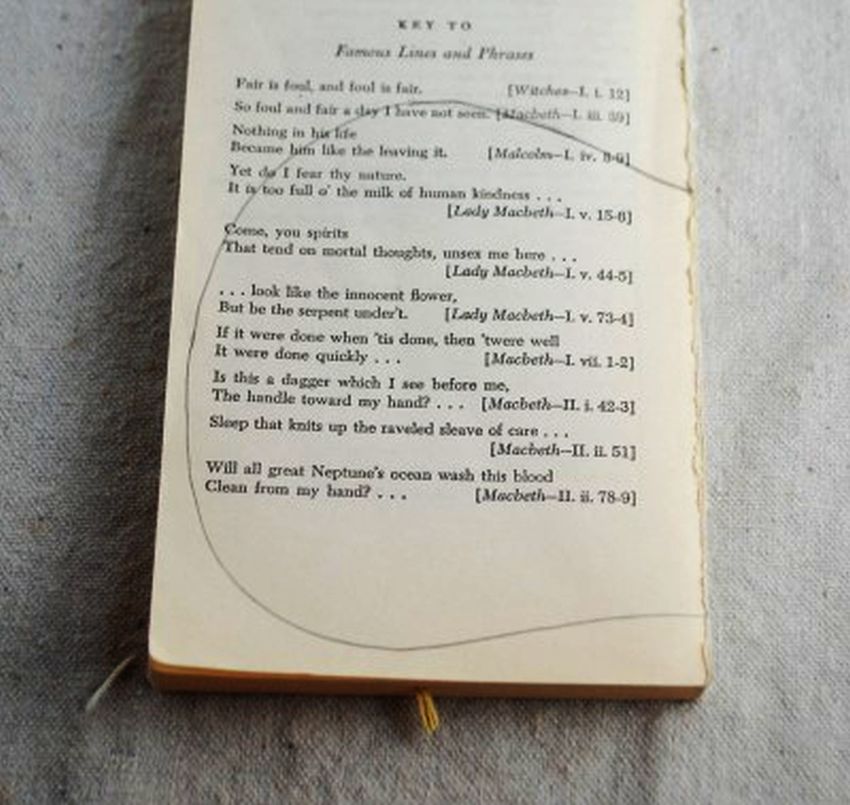
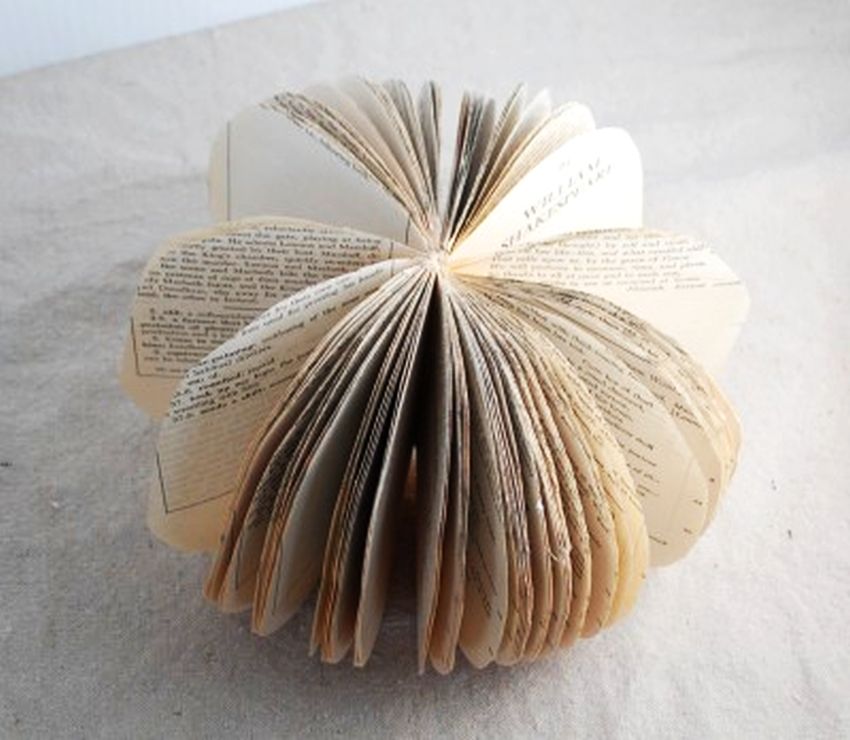
Step 4: Now you have to open the book about halfway and further place your paper template on top. Keep the center of the pumpkin template on the center of the bookbinding.
It is better if you place it towards the top, where there’s enough of the book bind left behind for creating the “stem” of the pumpkin (in the given images there’s no pumpkin stem). You can make it without the step, depending on what you like.
Step 5: Now you have to trace around the pumpkin template using your pencil. It’s not a difficult task, you may have done it in your school before. You can involve kids in this process, as they will love to work on this craft project.
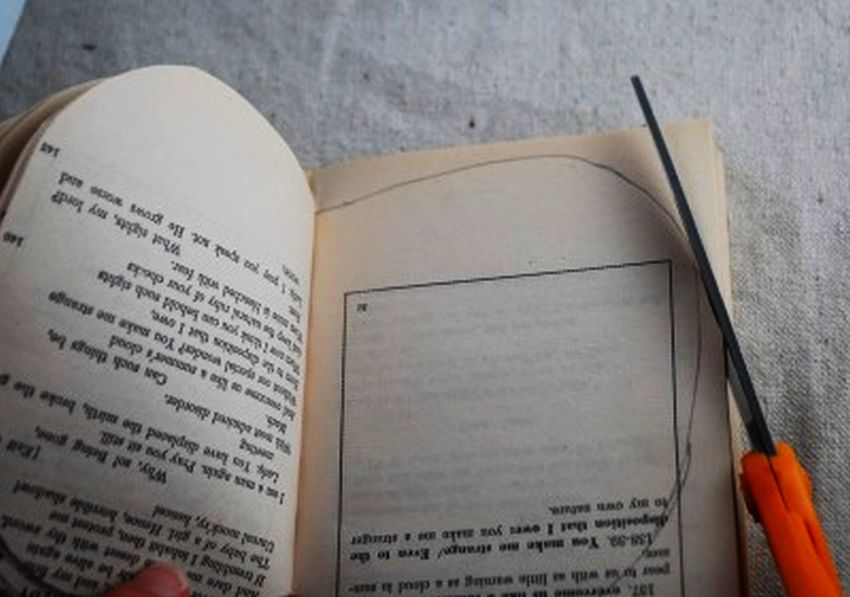
Step 6: In this step, you have to cut around the edge of your outline using scissors or an Exacto knife. We would recommend you to carve out one section of the book at a time and then move on to the next section.
This will make the two halves appear neat and tidy when you finally spread it into a pumpkin shape.

Also Read: How to Make Toilet Paper Pumpkin
Step 7: You will probably have to cut through a few pages at a time. This step needs a lot of patience, so brace yourself. You can use scissors or Exacto knife (whatever is more comfortable to you) to cut the pages.
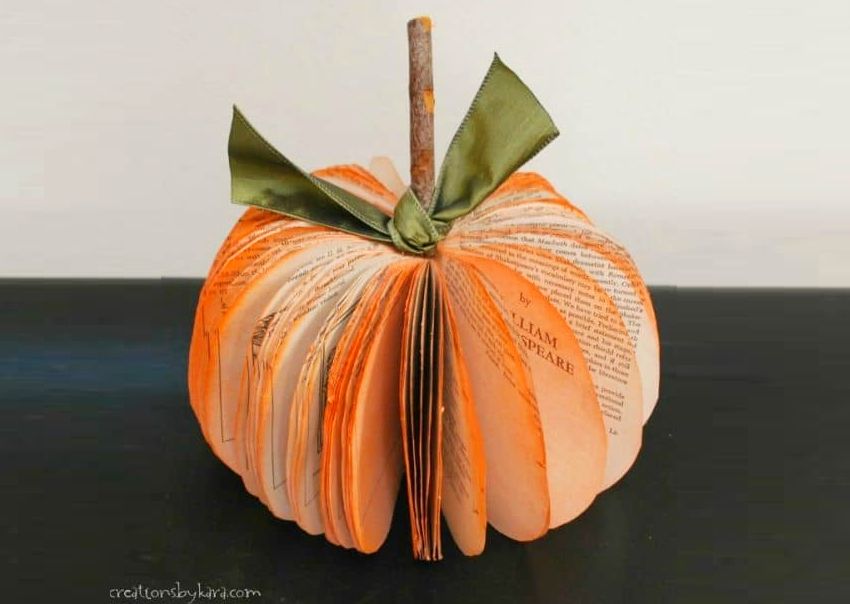
Towards the last couple of pages, you can even make some personal tweaks and leave the book bind at the top to craft it like the pumpkin stem.
You can also tear out some pages to make the process a bit easier for you and also to get a little gratification when you’re getting through the book.

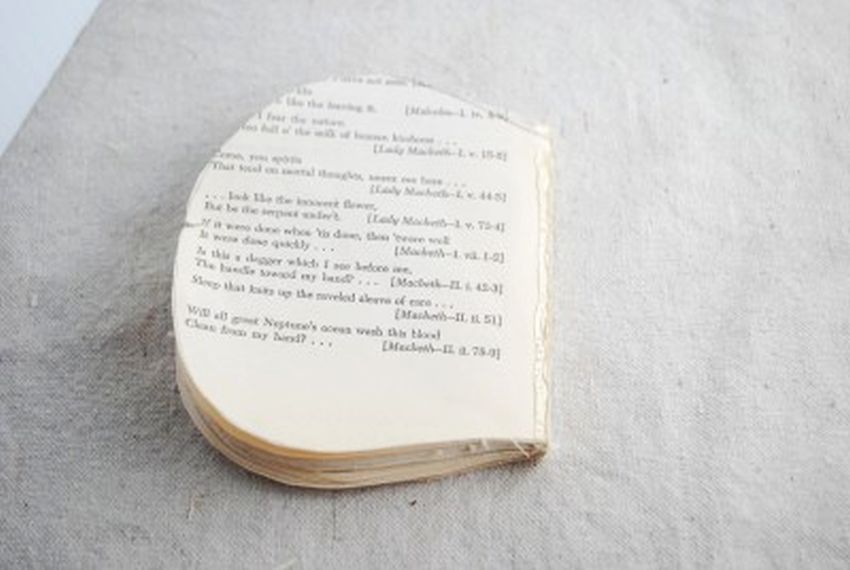
Step 8: Once you have cut out the complete one side of the books, it’s time to start with the other side. With one side of the book completely cut out, it’s time to start on the other side. Follow the same steps mentioned above to cut out the second half of the pumpkin as well.
Step 9: Once both sides of the pumpkin are cut out, you need to stick them together at the center of the book bind using a glue gun. Keep the two halves as close as possible to ensure the pumpkin shape is similar to the real one.


Step 10: Don’t freak out if your pumpkin is not looking exactly what you expected it to be when placed on a table. It still needs little fluffing out and tweaking. Go through each page again and crinkle it to keep one page separated from the other pages. Continue fluffing until you have achieved the desired result.
Step 11: Now it’s time to add some color to the paper pumpkin. Using a spray paint, you can add orange hue to the sides of the pages to make it appear similar to a real pumpkin.
Step 12: Your book page pumpkin is ready. You can decorate it using a ribbon or any other fun accessory you like. You can make as many book page pumpkins as you want to decorate your house with some eco-friendly accessories.

Here you go, the Book Page Pumpkin is ready. You can keep it anywhere you like and it surely won’t look out of place.

Do try making this fun DIY Halloween Pumpkin at home and also share the pictures with us.
Follow Homecrux on Google News!


