


With loads of pumpkin lights available in the market, these days people need not worry about carving pumpkins. There are a variety of ways to add spooky holiday décor to your home without real pumpkins. You can use artificial pumpkin-shaped lights or no-carve techniques such as paint, stickers or stencils to transform the orange fruit into a masterpiece without much effort. But if you are bored of such Halloween decorations, try making some concrete pumpkins to grace your home decoration this year.
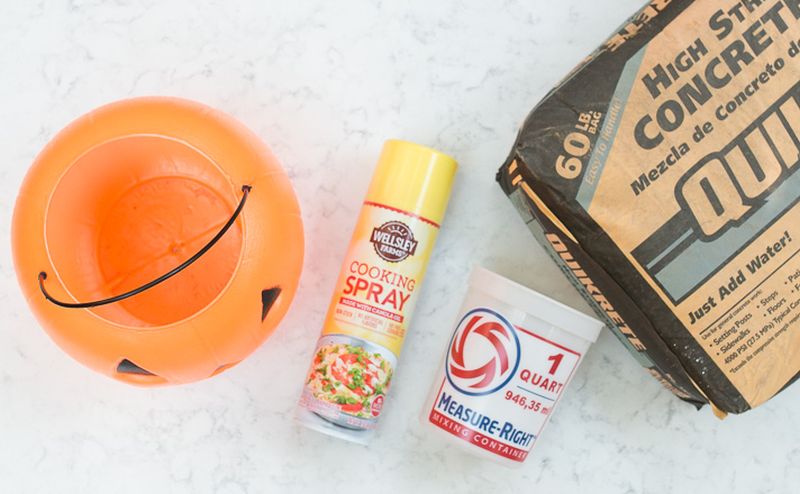
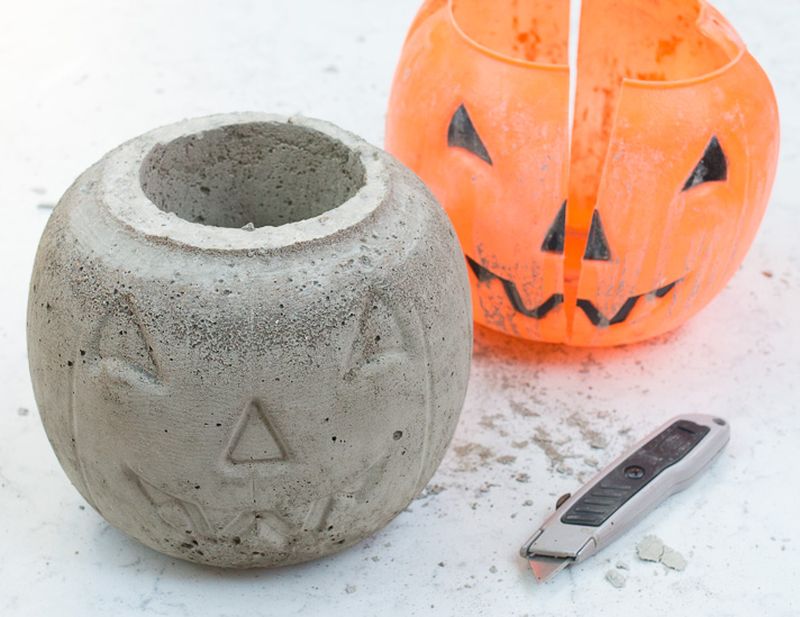
You can easily make concrete pumpkins from old plastic Halloween pumpkins or silicone molds using a crafty concrete mixture. It is an easy DIY project to create your own natural gray jack-o’-lantern with minimum efforts. You will need a plastic pumpkin bucket as a mold to dry the concrete mixture, and use acrylic paint to customize the concrete pumpkin in your own style.
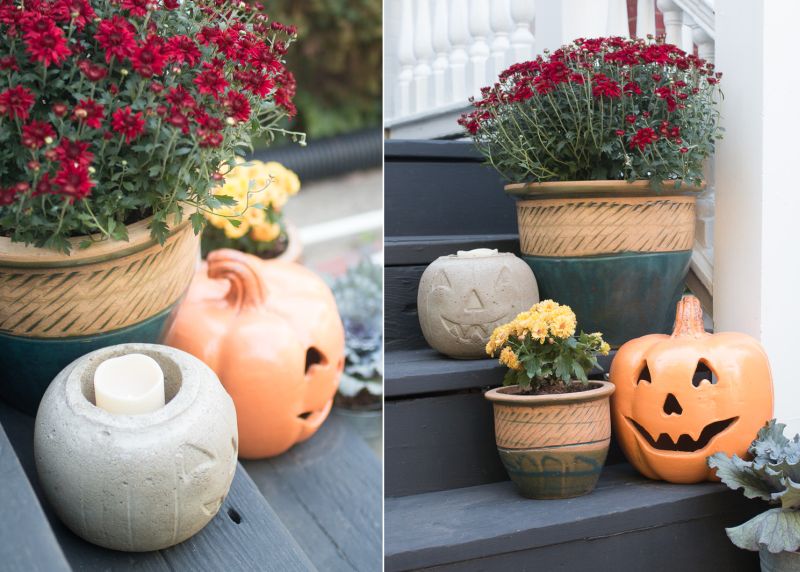
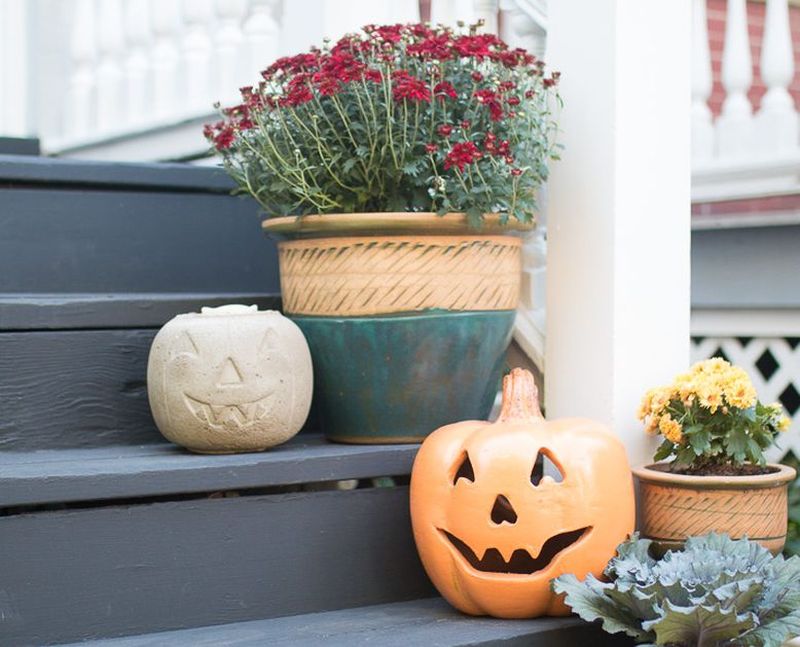
If you are planning to leave it as it is (with paint), its modern industrial appearance is capable of blending into any space. It can also be used as a planter in your front yard.
Also Read: 10 spooky outdoor Halloween decoration ideas for the festival of the dead
Making concrete pumpkins is a simple task. Just follow the steps below to create your own DIY concrete pumpkin.
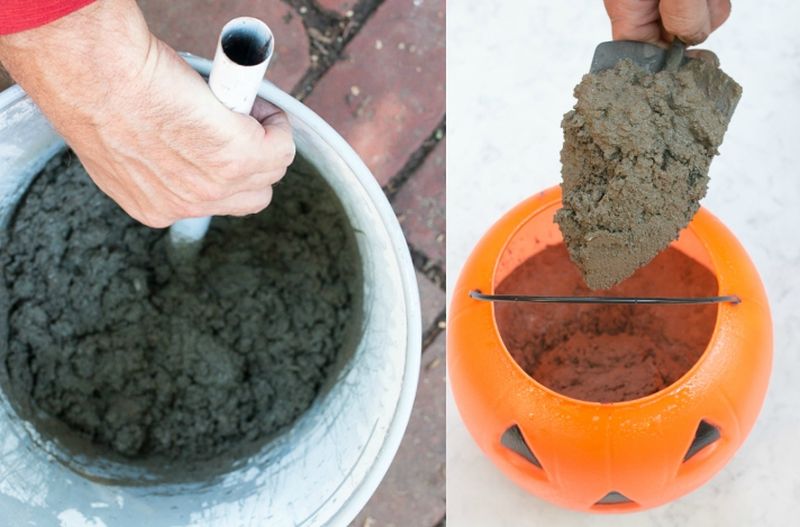
- First of all, make a fine concrete mixture. It would be better to use fast drying cement.
- Apply a coating of some greasy oil before filling the Halloween pumpkin with concrete so that the plastic mold can be removed easily later.
- Now quickly fill the bottom portion of the pumpkin bucket with the concrete
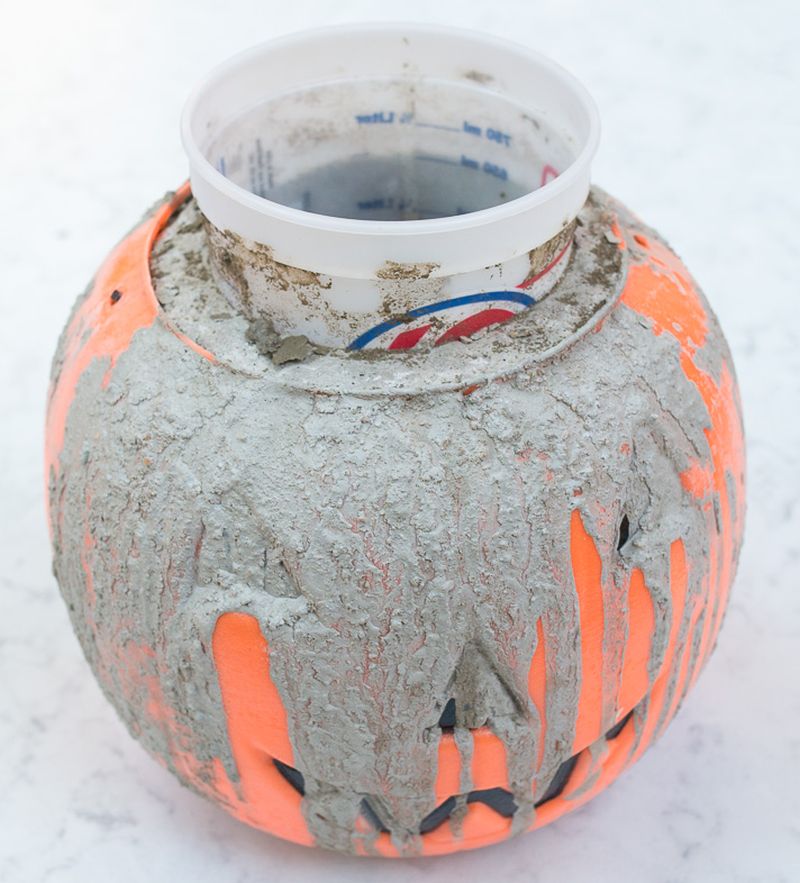
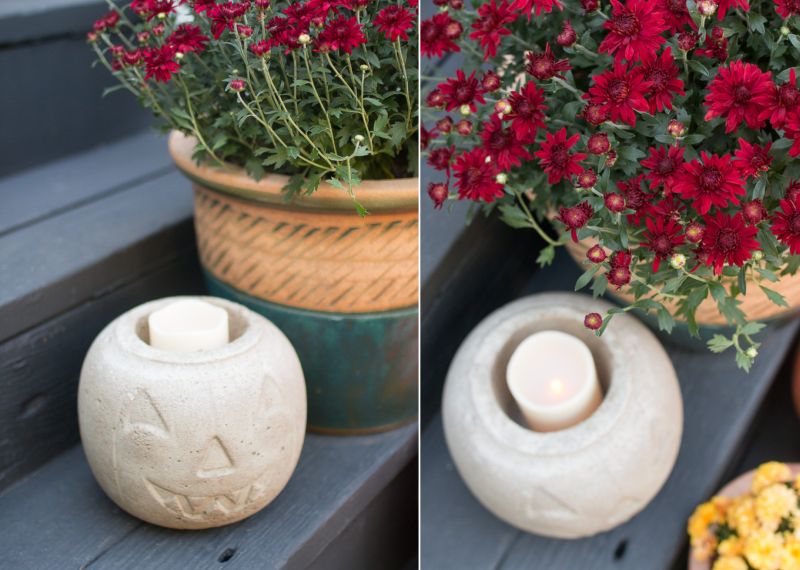
- Apply greasy oil to a cup of the size you want the central hole in your pumpkin. You have to push the cup into the concrete mixture so that some spare space in the center can be used to place candles or plant some vegetation later.
- Now fill up the pumpkin bucket with the concrete mixture to the top but remember to keep the large cup in the center intact.
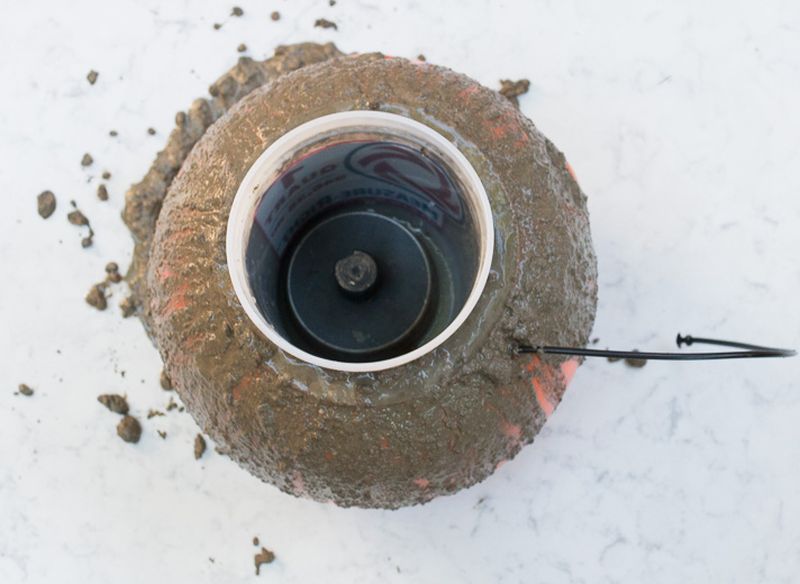
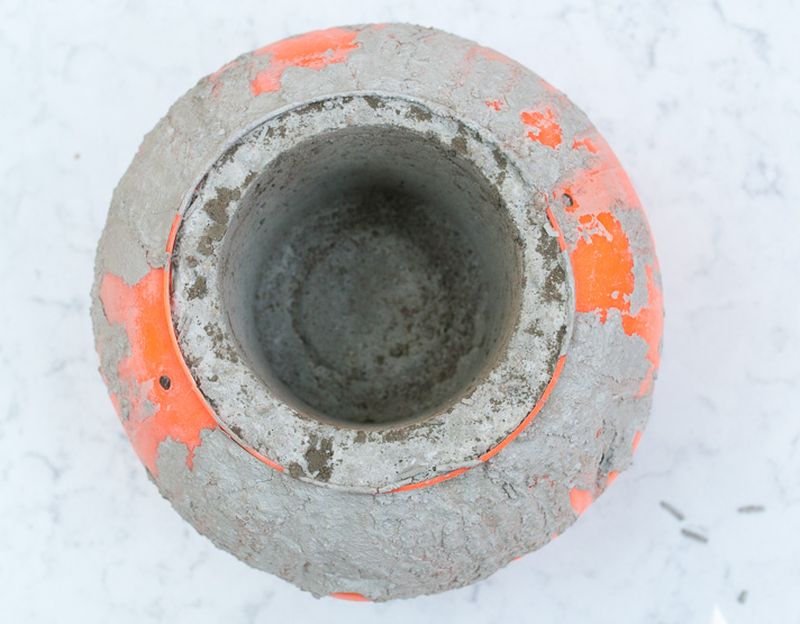
- Gently lift and drop the pumpkin bucket to remove air bubbles and settle the cement into every last nook and cranny of the mold.
- Dry it for at least 24 hours in a cool and dry space— it’s even better to leave for 2-3 days.
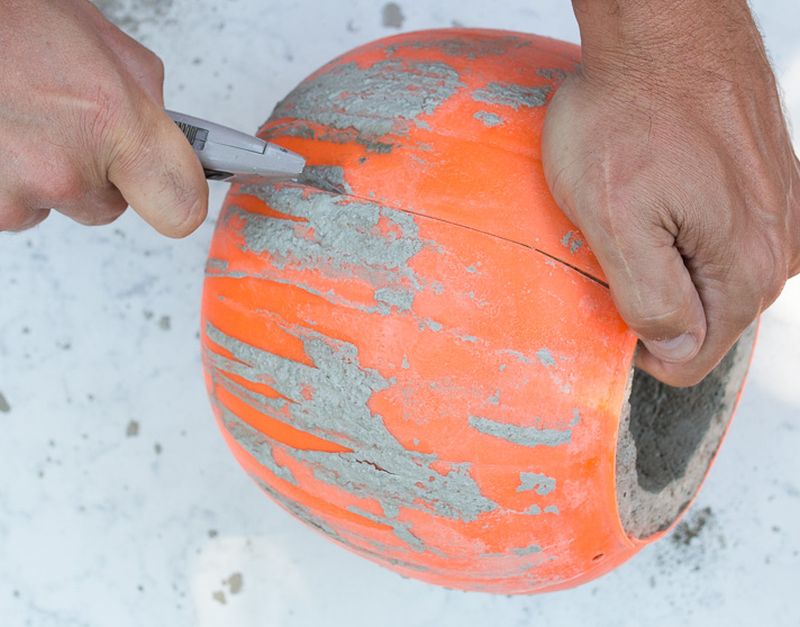
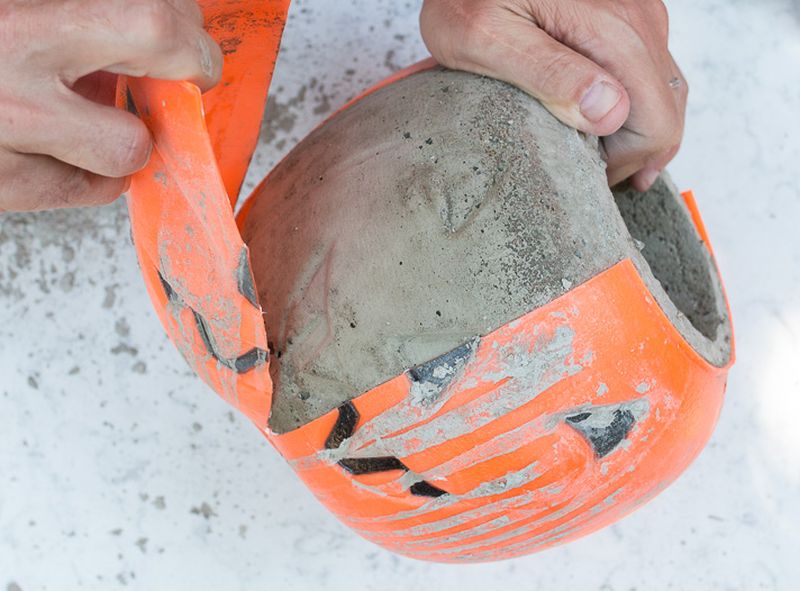
- Once it’s dry, cut the plastic mold and remove completely without damaging the concrete surface.
- You also need to sand it thoroughly to smoothen rough edges and remove any extra particles.
- Now your pumpkin is ready for decorating. You can paint it in your desired colors.
This DIY concrete pumpkin can be used as candleholder and planter. It can be used indoors, as well as outdoors. With Halloween around the corner, it will be a great DIY project to encourage kids to take part in decorating home for the festive season.


Via: 17Apart
Follow Homecrux on Google News!


