


Noticing any cracks, irreversible stains, or loose grout on the bathroom floor? They are unsightly and a hazard. That is the moment you realize it is time to retile your bathroom floor. Tiles are strong and built to last, but they are not indestructible. The good news for you is that you don’t need to hire a specialist to change the tiles on your bathroom floor; you can do it yourself on a long weekend. Retiling the bathroom floor is an intermediate-level project with a moderate learning curve that requires just a bit of research and a couple of trial-and-error attempts once you start. So let’s teach you how to retile your bathroom floor.
Basic Things to Know About Retiling Bathroom Floor
Before we get to work, let’s learn a few basic things, which will help you accomplish the task much easily, without having to redo the entire thing.
- Tiling tools and materials can help make the process smoother.
- If it hasn’t been used previously, use the uncoupling tile membrane while retiling, installed between the subfloor and the tile. It adds waterproofing and breaks the bond between the subfloor and the tile, stopping tile cracking.
- Don’t undermine the plastic tile spacers; they create perfectly spaced tile seams, eliminating guessing.
- Use a notched trowel to dispense the right amount of thinset.
- Consider using pre-mixed thinset to eliminate the need to blend dry thinset mix with water.
Safety Considerations
When working with tiles, you will have to use a tile saw. Be careful when operating a wet tile saw, as it can mix water with electricity. Consult your wet tile saw instructions for safety guidelines, such as creating a drip loop in the electrical power cord and plugging the saw into a ground fault circuit interrupter outlet.
Also Read: How to Repair Cracked Shower Tiles – Guide to do it Like a Pro
Materials/Equipment Required:
- Notched tile trowel
- Wet tile saw
- Measuring tape
- Rail tile cutter
- Tile nipper
- Rubber grout float
- Indelible marker
- Tile spacers
- Bucket
- Chalk snap line or laser level
- Thin cardboard spacer
- 12-inch ceramic or porcelain tile
- 3/4-inch tongue-and-groove plywood
- Uncoupling tile membrane
- Floor leveling compound
- Thinset
- Tile grout
- Grout sealer
- Grout haze remover
- Protecting gloves and glasses
How to Retile Bathroom Floor

Determine the Number of Tiles You Need
Before you begin, it is imperative to measure the surface to determine how many tiles you will need to retile the bathroom floor. Measure out the square footage by multiplying the length and width. Once that is done, order at least 10 percent more tiles than you think are required. This step will also help you determine how much moat, grout, and backing board are needed.
Remove the Old Tiles
The first step in bathroom retiling will be to remove the old tiles. To do so, you need a hammer and a utility or putty knife. Start by gently placing the prying tool against the side of the old tiles and pushing them out. Be sure not to dig into the floor. Continue prying the tiles out of the floor, and then scrape any remaining mortar using the knife.
Clean and Prepare the Surface
Before you start retiling the freshly peeled bathroom floor, you must get the surface smooth and flat. Ensure there is no piece of mortar left, as it will lead to irregular retiling. You need to invest some extra time to make sure there is no dust or debris on the surface because fixing any mistakes afterwards can be quite expensive. So take your time and ensure everything is in place.
Prepare Underlayment
Attaching an underlayment of cement board (backer board) to your sub-flooring will provide a sturdy and level surface for the tiles to stick to. You can use a circular saw to cut panels to fit the bathroom floor and cut holes as required to work around the toilet or other bathroom fixtures. Attach the backer board to your subfloor using a drill, spacing the screws at about six inches apart.

Decide the Tile Layout
Once the underlayment is ready, lay out your tiles ahead of time so you can figure out the tile layout. Aligning them and deciding the layout will help you make any adjustments before you apply any adhesive, at which time it will be difficult to correct the mistakes.
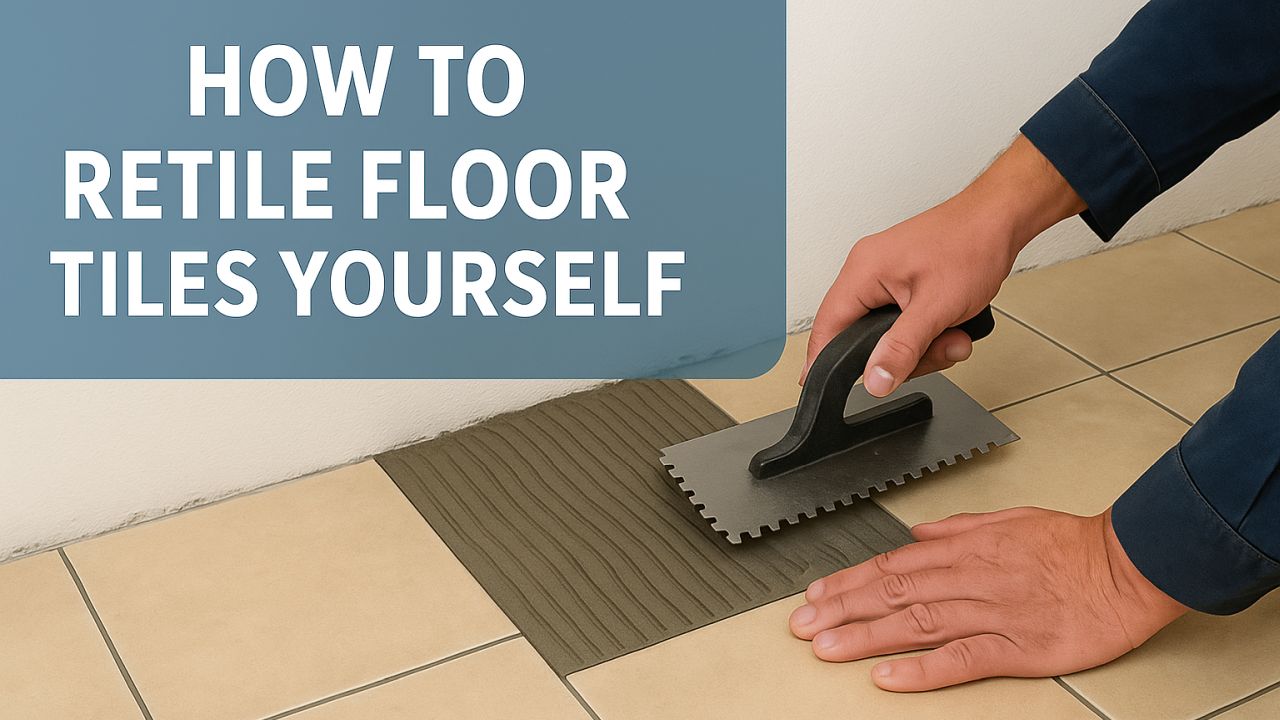
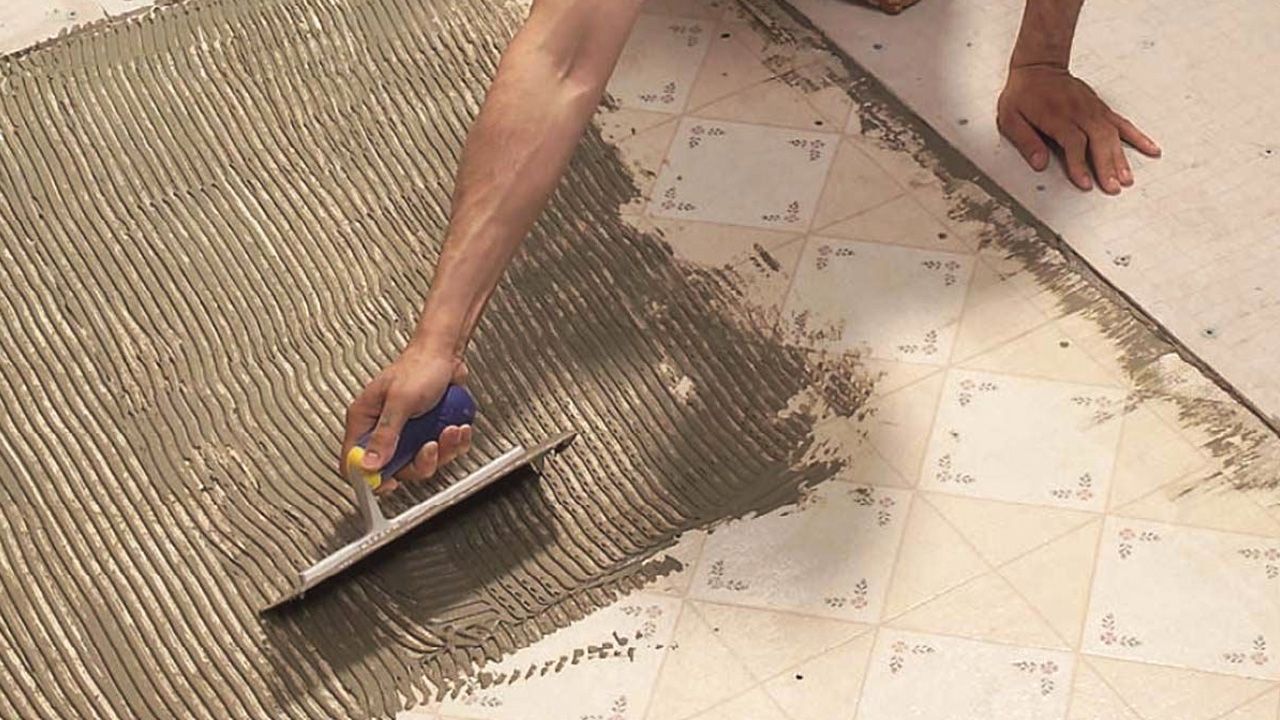
Begin the Installation of New Tiles
Once you are sure of the tile layout, start installing them. Comb out a bed of mortar mix using a notched trowel and start placing the tiles. Use spacers between the tiles to make sure that you leave enough and equal room for grout. When you reach the end of the floor, you might need to cut tiles to fit perfectly with a wet saw. You may also consider trimming tiles around the cabinets, shower niches, or doorways. Once the tiles are installed, leave the mortar to set overnight.
Add Grout Between Tiles and Caulk
After the mortar has dried overnight, start by removing spacers from the mortar. Then, spread the grout over the tiles and press it between the tiles using a trowel. You can also use a sponge to remove any excess grout afterwards. Since the grout will harden and glue to the tile, ensure to do this step quickly. You should avoid heavy traffic for somewhere between 48 to 72 hours, allowing the grout to dry.

Remove Grout Haze and Seal It
Once the grout is cured, add a grout haze remover to the bucket with cool water. Clean the grout haze from the tile surface with a soft sponge, leaving the tile sparkling. Next, apply a grout sealer to prevent water from getting through the tile seams and under the tiles.
And that’s it. You can now use your bathroom with a newly retiled floor. Have fun DIY-ing.
FAQs About Bathroom Floor Retiling
A. You cannot lay tile directly on a plywood subfloor, as the wood underneath the tile may lead to cracks. You can lay the tile directly on top of a concrete subfloor.
A. The floor tile needs to be a thicker construction than shower tile for withstanding bathroom fittings, fixtures, and regular foot traffic. More importantly, the bathroom floor tiling also needs to be water- and slip-resistant.
A. No. The tile should be left to dry for 24 hours before grout can be applied. You can use rapid-setting tile adhesives to speed up the process, but it is best to allow plenty of time for a sturdy finished project.


