


One common DIY project is to build a concrete base for a garden shed or wooden building. This process can be handled in quite a few different ways.
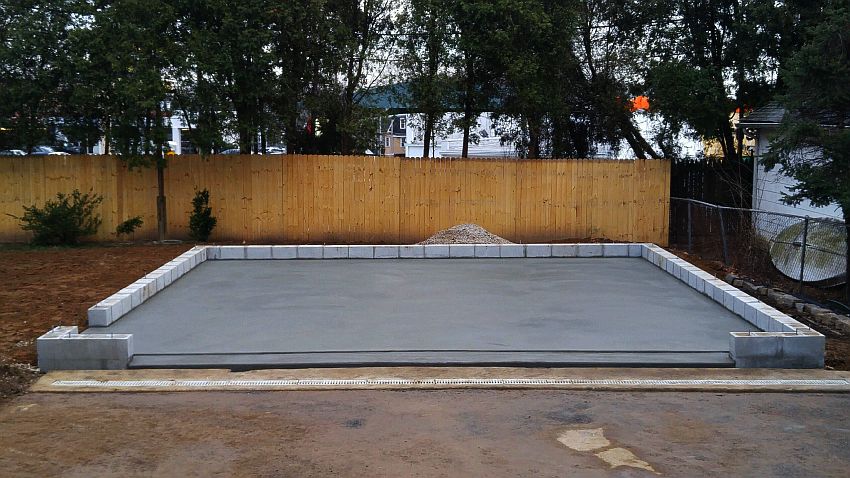
In this instructional article, we walk you step-by-step through a traditional building method that prevents moisture from coming up through the slab with the help of a damp proof membrane. When finished, the six-inch thick foundation sits above the surface of the ground, ready to host your structure.
For smaller buildings, the slab can be placed down in the ground. This eliminates the need to cover the edges with brick. Any brickwork is usually done for cosmetic purposes to give the finished building a clean, neat appearance.
To give you an idea of what to expect with the project; it begins by digging a hole that is slightly wider on each side than the floor of the building. Assuming that the ground beneath the slab is solid, it should be dug approximately 4-inches deep. After a damp proof membrane has been placed inside, the concrete is then poured on top.
Regardless of which construction method you choose, the ground needs to be completely level before you pour the concrete.
Testing the Ground for its Firmness
To determine whether or not you need to install a hardcore sub-base, test how firm the ground is in the area where the building will be placed. To accomplish this, use a 2-inch square post. Don’t sharpen the end, instead, try to drive it into the soil to see how far it can go. Once you pass approximately 6-inches, it should become extremely difficult.
If it is challenging to drive the post into the ground, it is most likely firm enough to support a wooden garden building.
On the other hand, if it is easy to drive the post into the ground, prepare the site by removing the top 4-inches of dirt in an area that is approximately two-foot wider on every side than the floor of your wooden garden shed. Fill the entire area with scalpings. The term “scalpings” is used to describe crushed stone aggregate. Although this material costs slightly more than broken brick hardcore, it is way easier to work with.
The scalpings need to be compacted before the concrete is poured. If they aren’t tight enough, they could shift over time, causing the concrete slab to crack since it doesn’t have enough support.
Building a Timber Form for the Concrete
At this point, you should have a level area prepared that is a little wider on each side than the floor of the wooden garden building. When purchasing timber for this project, choose 150 mm x 25 mm treated timber. The timber should be cut a foot wider and longer than the base to build the form for the concrete.
Position the timber in the shape of the base. Then, using a heavy hammer, pound several 2-inch square posts along the outside edge of the form. This not only helps the timber stand up but also keeps it from leaning outward under the weight of the concrete.
Use a spirit level when putting the posts in the ground to ensure that the formwork remains level. Once everything is level, use nails to attach the boards to the posts. You don’t need to go overboard with giant screws or nails since the concrete helps hold the boards stationary. Saw off any portions of the posts that are higher than the top of the boards. This makes leveling and tamping the concrete easier.
Also Read: Reasons to Build a Summerhouse in Your Garden
Verify that the formwork corners measure 90-degree by using a measuring tape. Measure the distance diagonally from corner to corner in both directions. These measurements should be exactly the same. If there are any differences in the measurements, keep adjusting the form until it is perfectly square.
Now that the frame is in place and has been leveled, you can add a layer of sand to the base. This helps keep the damp proof membrane, which is made out of polythene, from getting ripped or punctured. Once the sand is in place, position the polythene inside of the wooden frame, making sure that all of the corners are tight.
Pour Concrete to Build the Foundation
The next step in the process is to mix the concrete and place it in the form. Typically, this part of the project will go more smoothly if you have a helper available. Once the concrete has been placed in the frame, lay a piece of timber across the top of the frame. Have one person stand on either side. Begin wiggling the timber across the surface of the concrete, smoothing it out until it is level with the top of the form.
Position the timber on its narrowest edge. Move it forward and backward across the top of the frame while simultaneously pulling it over the surface of the concrete from one end of the frame to the other. This helps spread the concrete evenly throughout the frame.
The next step is to tap the frame with the board by lifting it up about 4 inches and tapping it back down. Work in unison with the other person so that the board hits the frame on both sides simultaneously.
The vibrations from the board hitting the frame help the concrete level itself naturally. This process is known as tamping.
The last step in the process is to walk around the outside of the frame, using a hammer to gently tap the outer edge of the formwork. This helps any air bubbles in the concrete rise to the surface.
Add the Brickwork and You are Good
The purpose of the brick wall is twofold. First, it keeps the damp proof membrane in the proper position so that moisture from the ground can’t get between the bottom of the slab and the membrane. It also makes the slab look more attractive.
While the concrete for the slab is setting, start digging a trench around the outer perimeter, running parallel to the edge of the frame and directly next to it. Add concrete to the trench once it is finished to create a base for the small brick wall that you will be building around the base.
Since the base is most likely permanent, it is important to make it look nice along with ensuring that it functions properly. Once the concrete has set for approximately a day, remove the timber from the base.
While ensuring that the polythene is in the right position, add two rows of bricks around the entire base. For the top layer of bricks, any indentations in the bricks should be placed facing downward so that the top is flat and smooth. Once the bricks are in place, cut off any extra polythene a short distance below the top of the bricks. Then, seal the joint between the slab and bricks using mortar. After pointing the brickwork, the base of your shed should look fantastic.
Also Read: Things You Need to Know Before Building Garden Decking
Conclusion
When constructing your wooden garden building, it should sit directly on the concrete rather than on the bricks. Although the bricks are designed to be decorative, as long as you made them correctly, the shed can sit on them, as well. Ultimately, the choice is yours. It depends on what you want the shed and the base to look like and how you intend to use it.
Follow Homecrux on Google News!


