


Have you ever thought of a scenario when you run out of batteries on a hiking trip? Well, we wish you never have to face such an odd situation, but to be on safer the side it is important you should be well prepared to manage such quandary.
To help you in such dicey situations, we’ve come across a small DIY project that takes no time to assemble and doesn’t require any special material. It is a tiny stove made from empty cans of beer or coke which can be a life saver.
Here is the list of material you’ll require to create the alcohol-burning DIY stove:
- Two Coke/Soda cans
- Knife or scissor
- Pin, drill or nail (to poke holes)
- Denatured alcohol
- Matchstick or lighter
It will take approximately 10-15 minutes to finish the project and here is how you can do it:
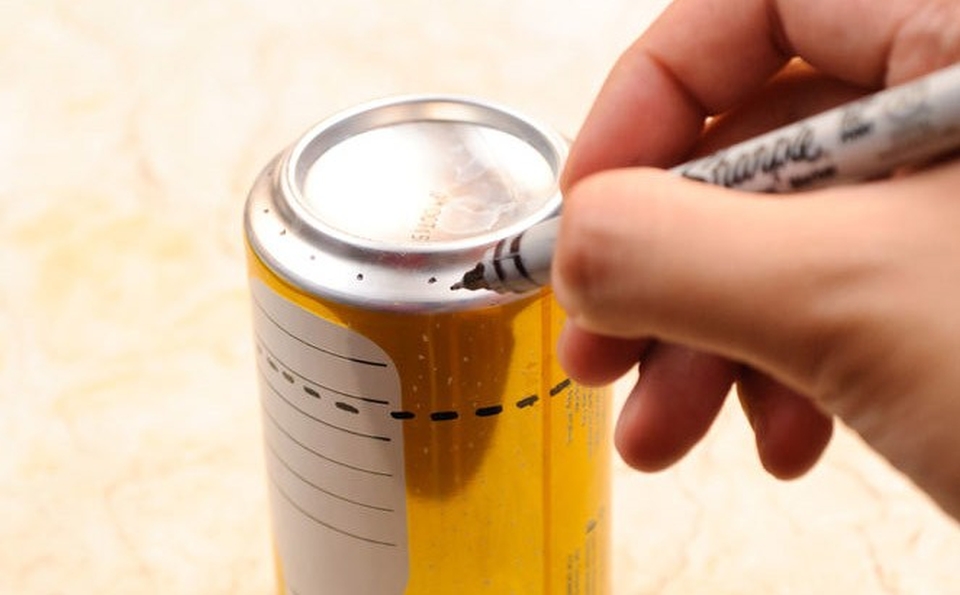
Step 1: Marking holes for burner
To create gas jets, mark bottom of the can where you’ve to make holes. You can use safety pin or a nail to make holes. Also, create drain holes in the center of concave portion; this will solve two purpose: it will act like a fuse dispenser and gas jets.

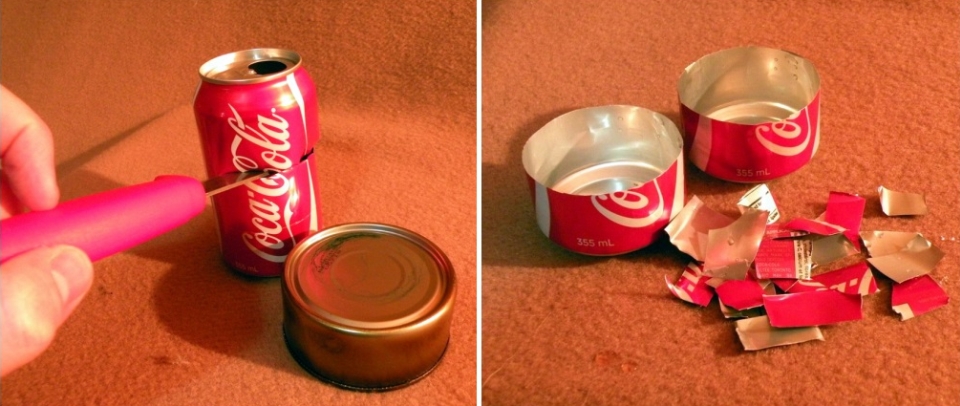
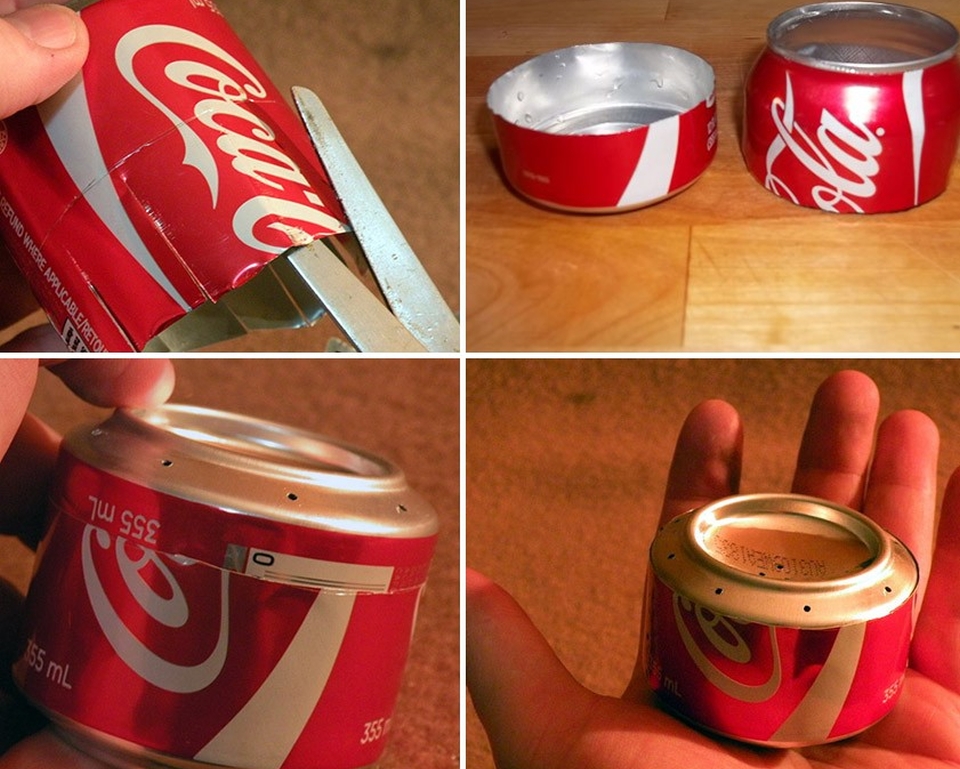
Step 2: Cut bottom of cans
Now create base for the stove, which will hold the fuel. Grab a new can and measure one-inch from bottom and cut into two pieces. You can change the height of the stove according to your preference, but being a first timer it’s better to stick to the standard height ratio. Mark the can and cut with the help of knife or a scissor.

Step 3: Putting pieces together
Now join the two halves of both cans, and yes, if you wish to use the stove for cooking or boiling water, add some cotton wool inside before sticking these two parts together. Once they are nested together, press both parts carefully with heavy object like book or a small hammer to lock tightly.

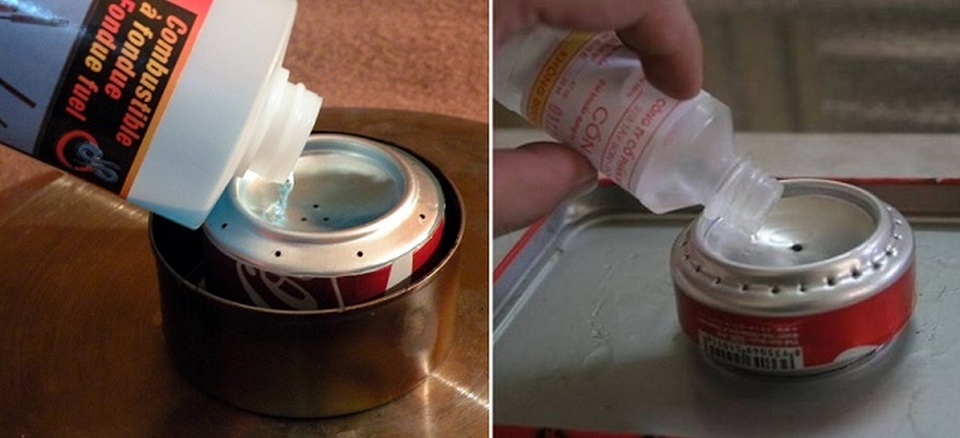
Step 4: Add some fuel
Now, pour some spirit slowly through the holes. Fill the concave cavity of the can with fuel and allow it to drain below into the stove. The best fuel is methanol which burns quickly without smoke, but comes for a high price. You can also use denatured alcohol, a non-expensive spirit that works well in can stoves.

Step 5: Ignite
Place the stove on a hard heatproof surface and light up with the help of a matchstick or lighter and voila! Your can stove is ready.
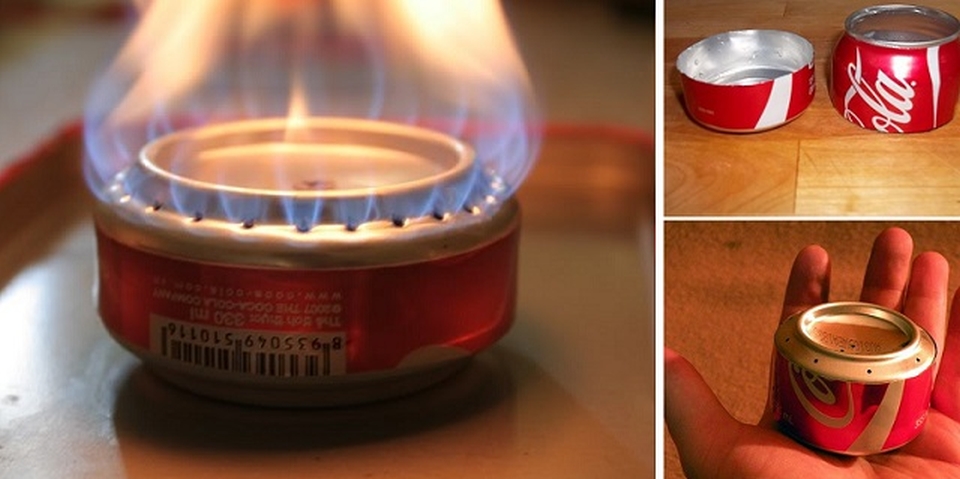
Due to its double-walled body, this DIY can stove is much stronger and can serve you a lot. So next time, if you are planning to camp or hike in your countryside, don’t forget to carry your personal stove with you.

Via: GoodsHomeDesign/MungoSaysBah


