


DIY is all the rage these days, and due to the countless online sources, it becomes difficult to find reliable sources. We have featured different DIY tutorials to explain how to create cute stuff from simple items. If you ever noticed that DIY crafts shared by Boston-based designer and lecturer Ben Uyeda are super easy to make, therefore anyone can try to make them at home.
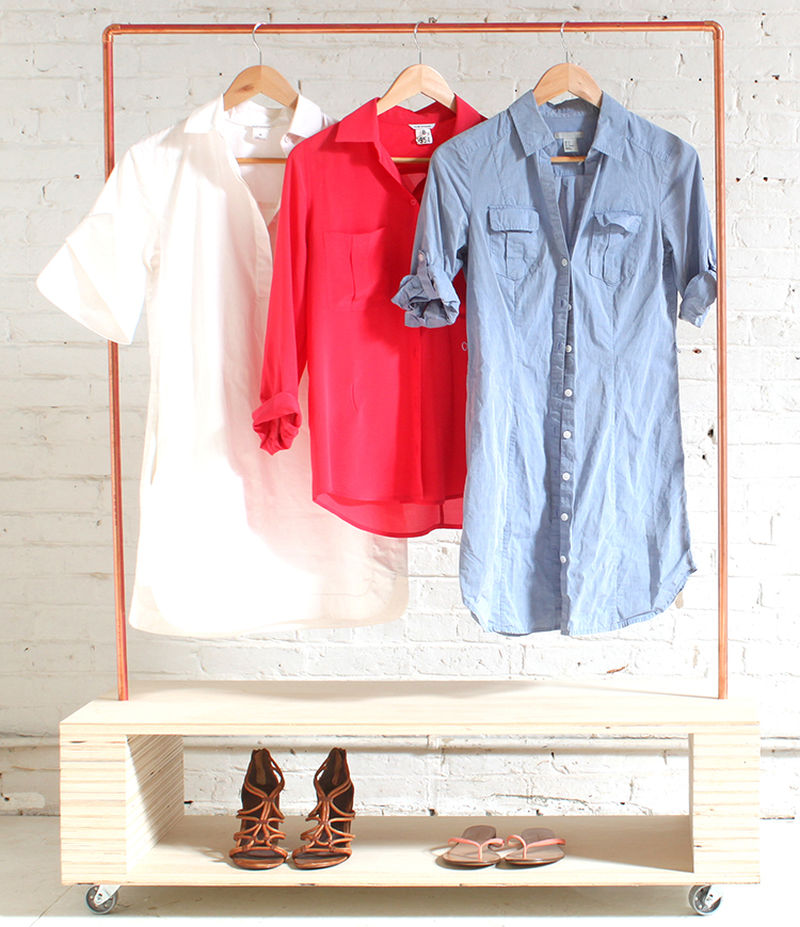
Take a quick outlook of one of his DIY projects to create rolling garment rack to make your vision.
Materials and tools
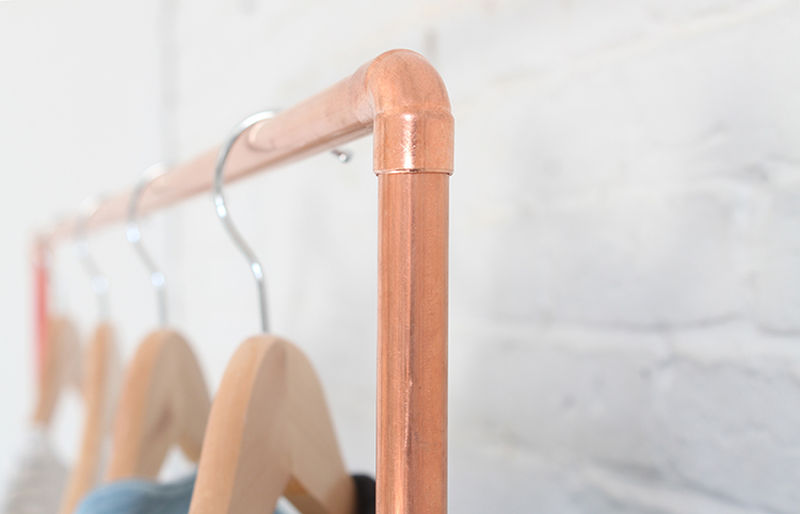
You don’t require any professional assistance and tools. Plywood, gorilla glue, screws, copper pipe and some elbow fittings are basic materials that can be purchased from standard timber stores. Drill, orbital sander, tube cutter and circular saw are some other needed tools for the project.
Instructions to build rolling garment rack
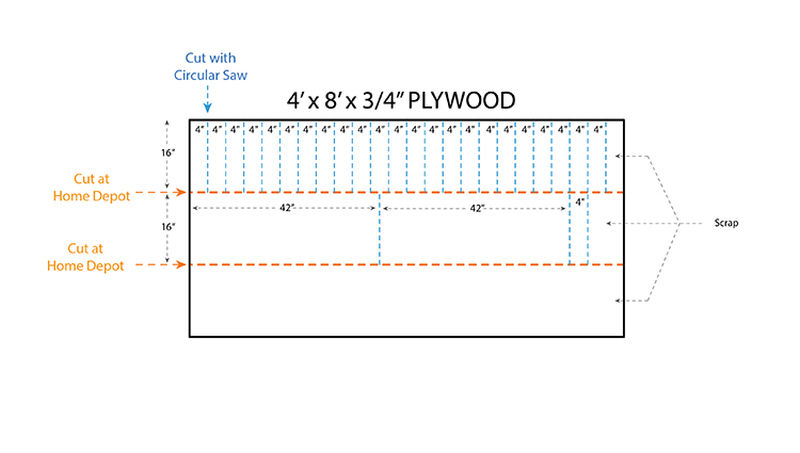
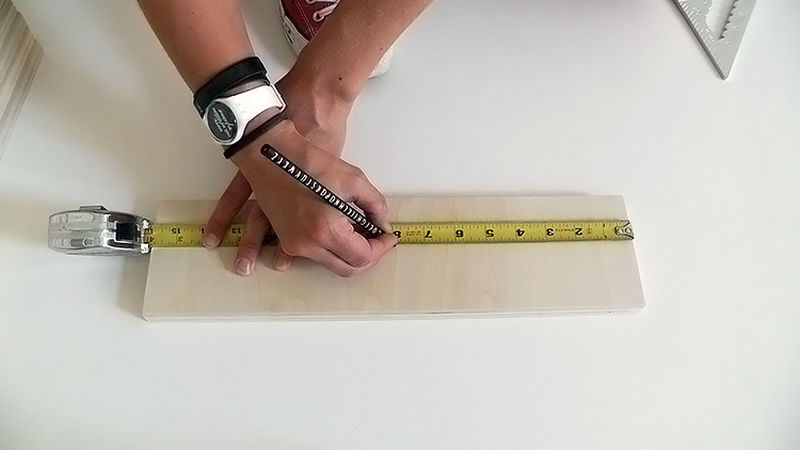
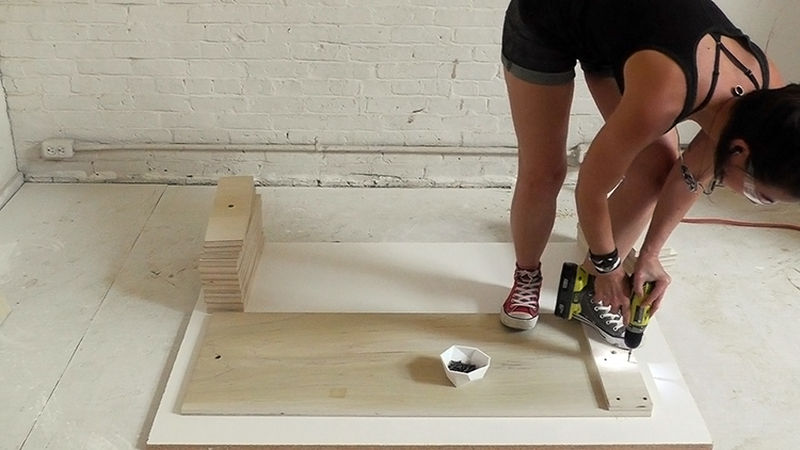
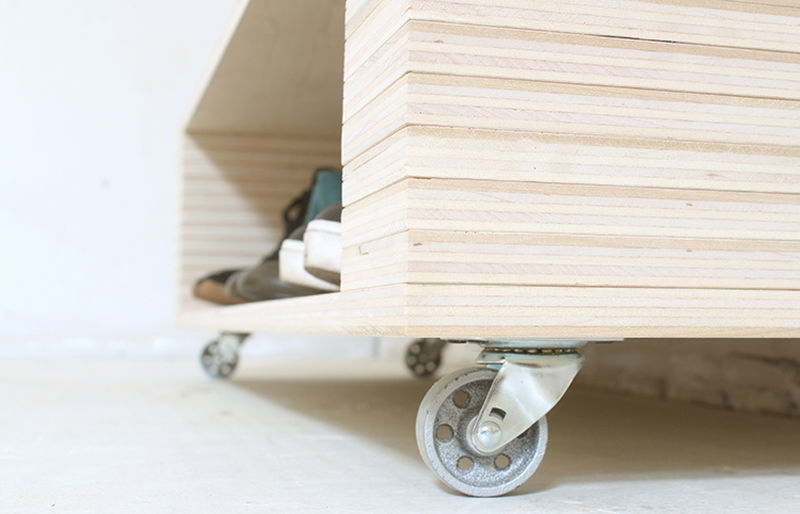
- First of all, cut two 16” x 42” boards for the base and the upper section out of the plywood sheet. You also need to cut twenty-four 4” x 16” strips to stack in between those pieces.

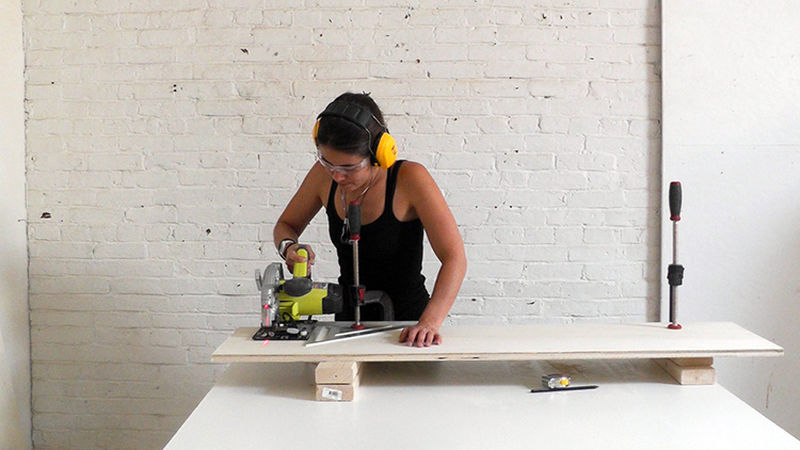
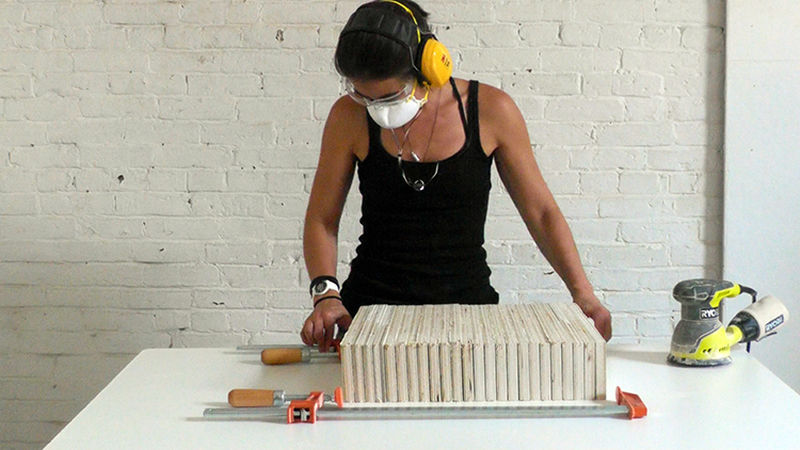

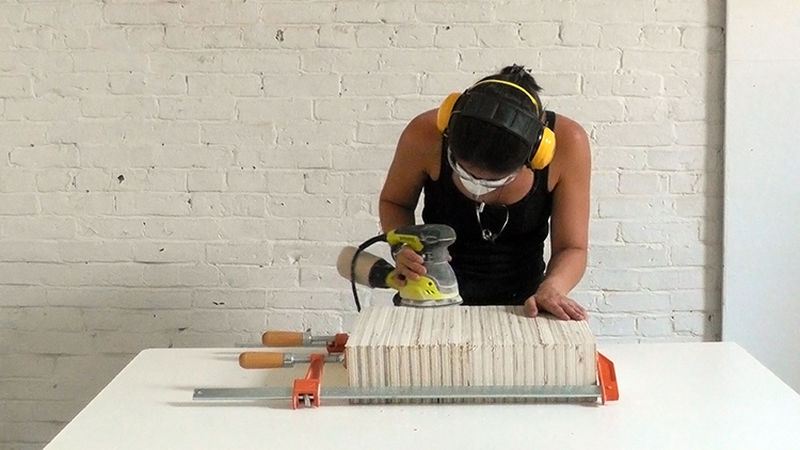
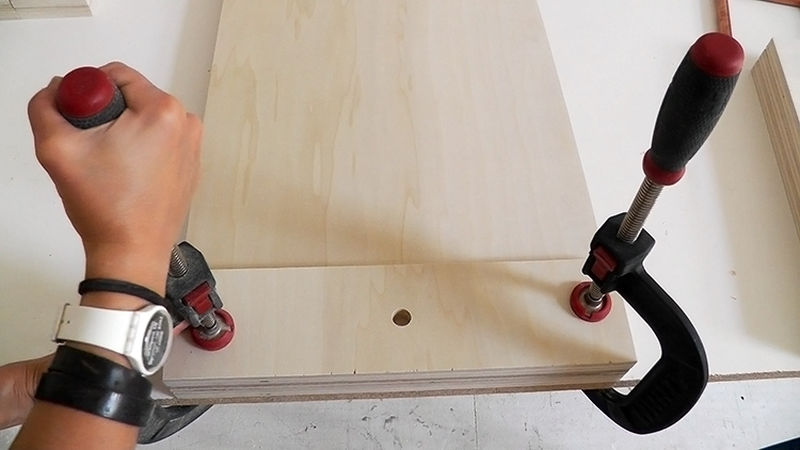
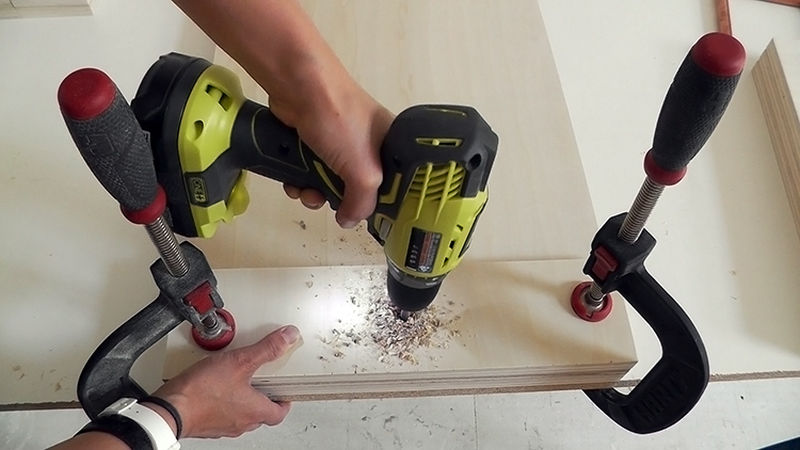
- Clamp all the pieces as one and sand completely with an orbital sander for finished look.
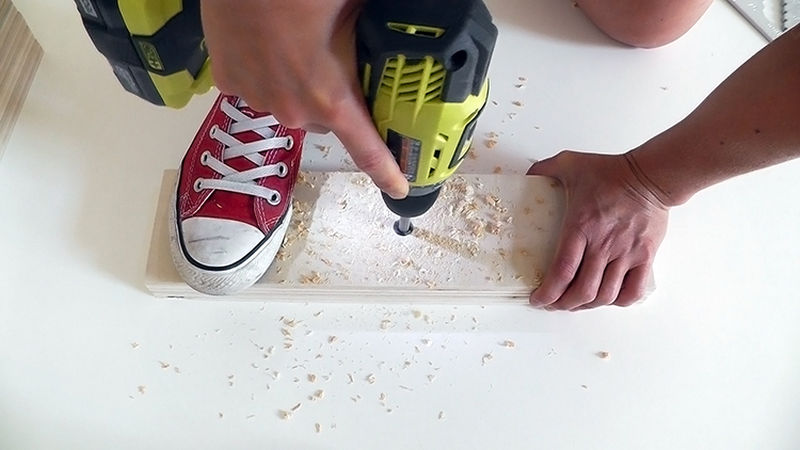
- Mark the center of a plywood piece and drill hole to affix the copper pipe. Use the first one to mark other pieces and then parallel drill holes on all of them.
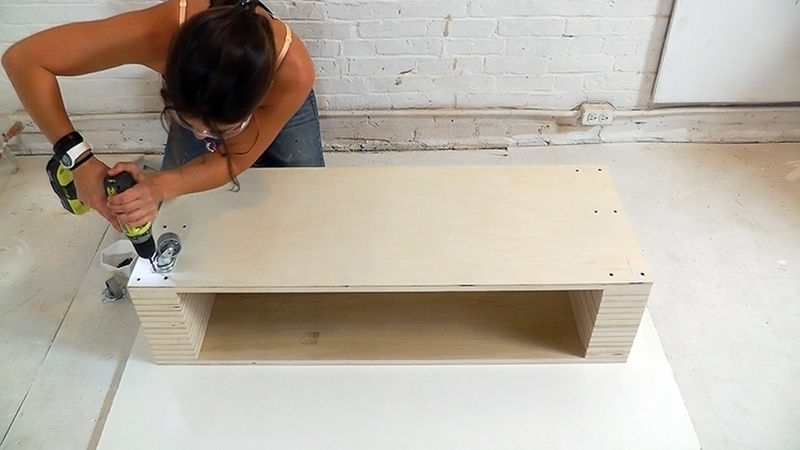
- Screw plywood pieces together but make sure to start from the top pieces so that screws won’t show up at the top of the rack. Also, keep the holes and screws aligned to fit the pipe perfectly.

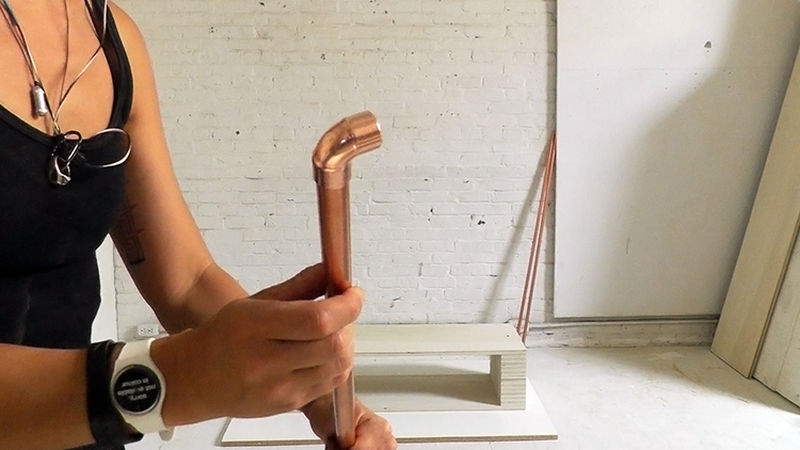
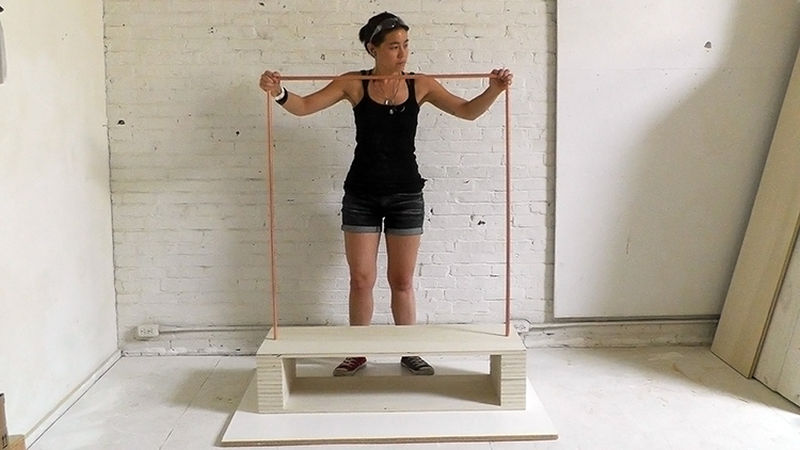
- Cut the pipes to size and glue up with the fittings.
- Add castors to the base of the rack for easy movement.
- The final step is to insert the pipe frame into the holes and you’re ready to use the DIY rolling garment rack.


Via: HomeDepot


