It is never too early to prepare for Halloween. There is still time for pumpkin carving but what to do before then? Well, whether you want a minimalist holiday setting or an extravagant one, you cannot go wrong with a DIY miniature graveyard for Halloween. We at Homecrux set out to try our hands at this DIY Halloween craft with materials easily found in and around any home.
Granted, it took quite some time to finish, but the result is truly beautiful. This DIY miniature graveyard for Halloween is one of the most inexpensive holiday crafts you’ll ever find and will cost less than $10. If you are a crafty person, it’ll probably cost even less. So let’s see what we need and how to do it.
Also Read: 30+ Outdoor Halloween Decorations You can Make Yourself
Materials Used:
- Plate and paper
- Clay in bulk
- Natural moss
- Craft wire
- Bandage gauze
- Toothpicks
- White, orange, and black acrylic color
- Paintbrushes
- Twigs and weed
Prep Time: 20 Minutes
Active Time: 1 hour 10 minutes
Total Time: 1 hour 30 minutes
Difficulty Level: Medium
How to DIY Miniature Graveyard for Halloween
Step 1: Gather clay, moss, twigs, and other materials (toothpicks, scissors, colors, and gauze) from around your house. Then assemble them in one place.
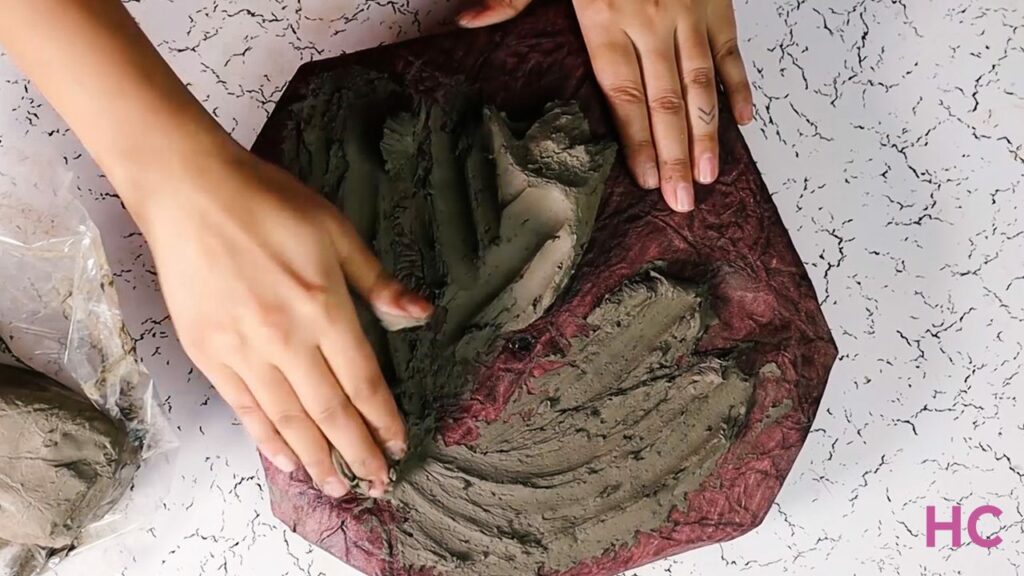
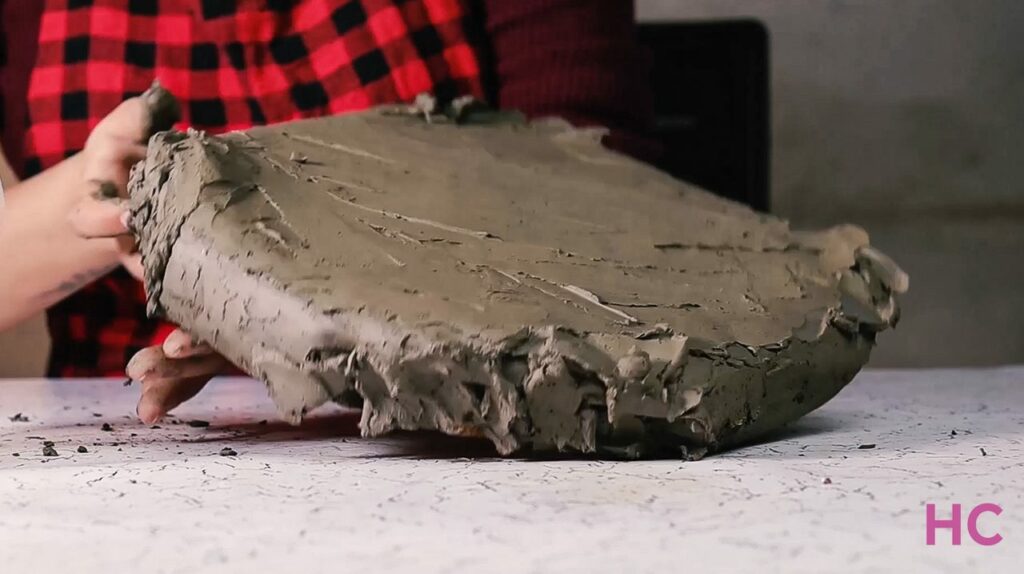
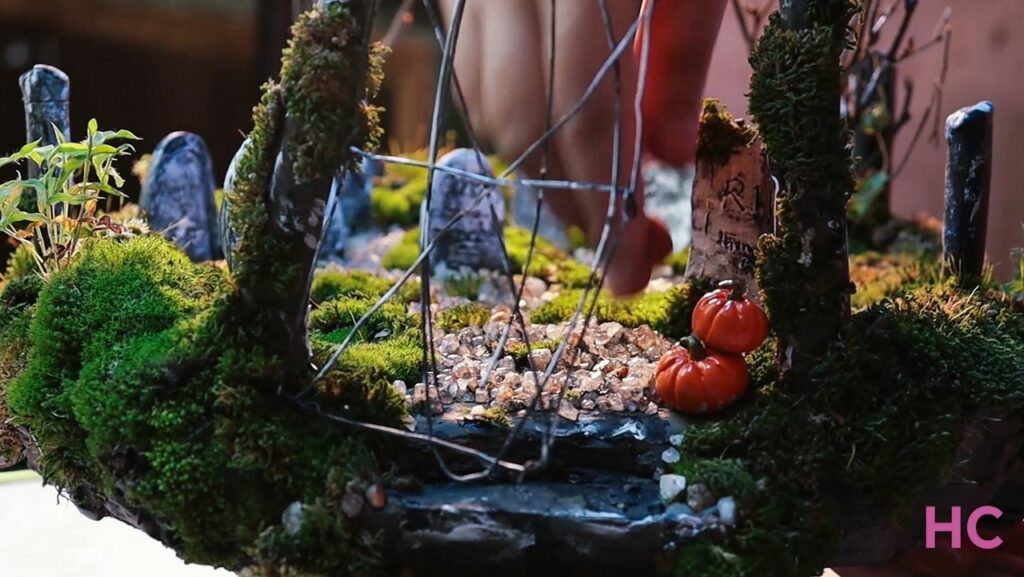
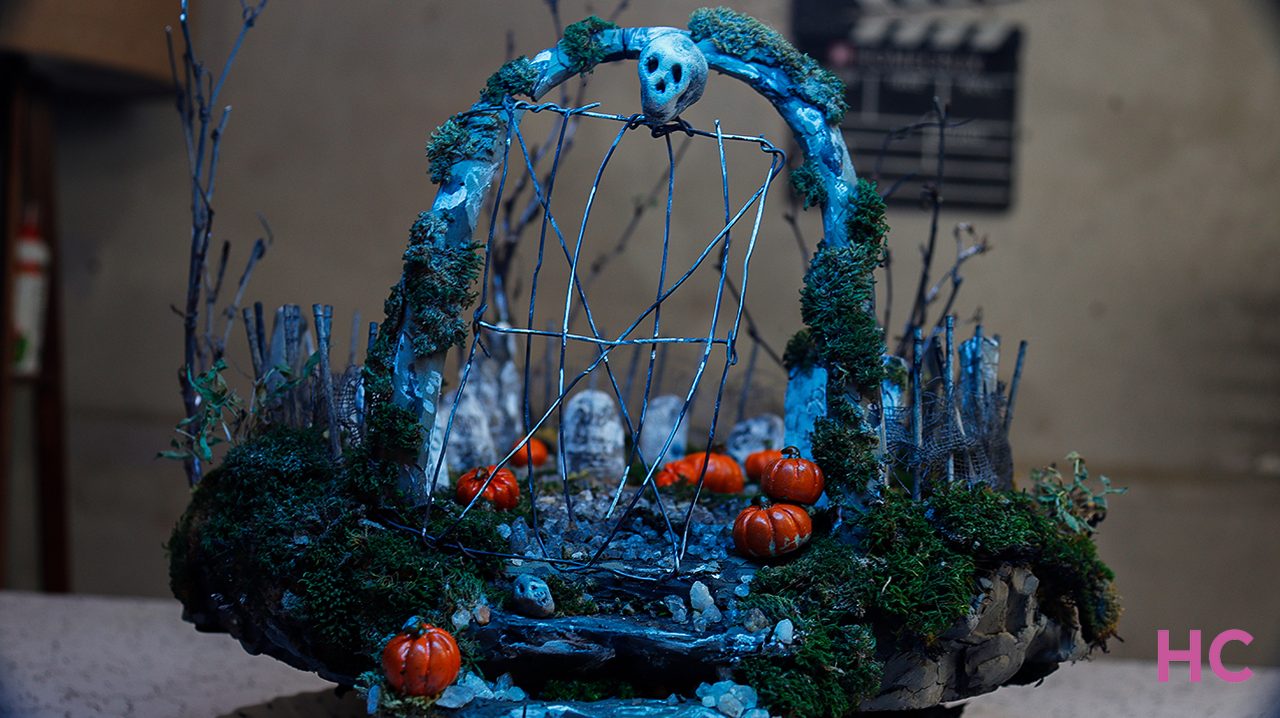
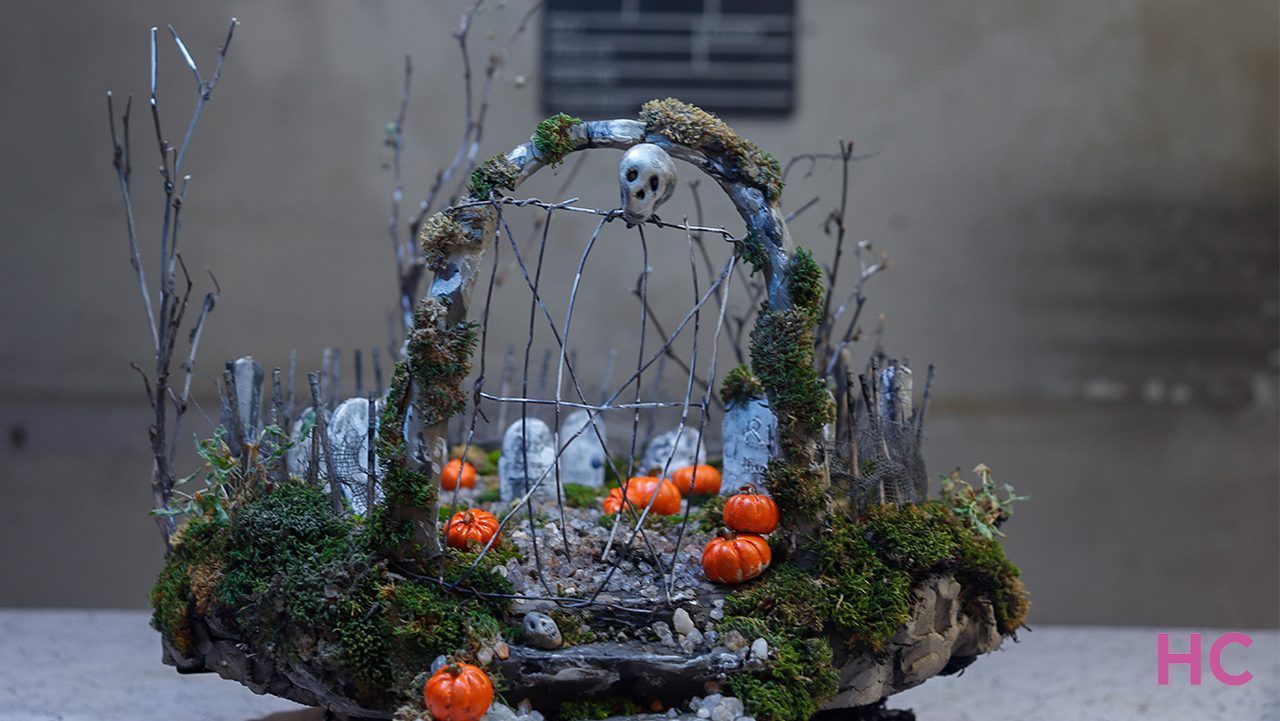
Step 2: You have the freedom to choose the size of your craft project. Our miniature graveyard measures 12×12 inches and is crafted on an inverted plate covered with textured paper, which serves as the ground for the graveyard.
Step 3: After covering the plate with paper, apply a half-inch to a two-inch-thick layer of clay, ensuring that it coats the edges and top thoroughly to create a sturdy surface for inserting tombstones, moss, twigs, and other things later on.
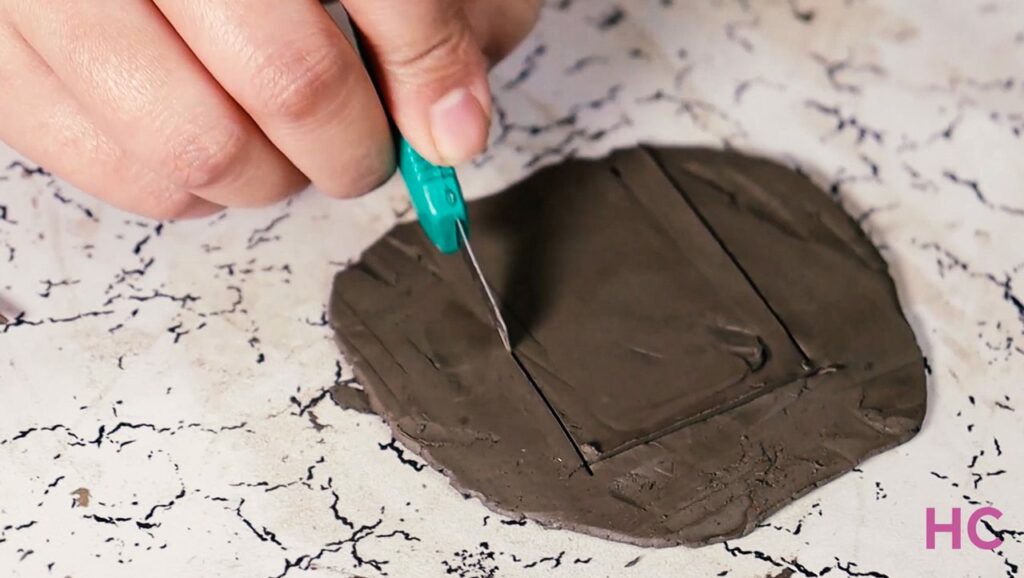
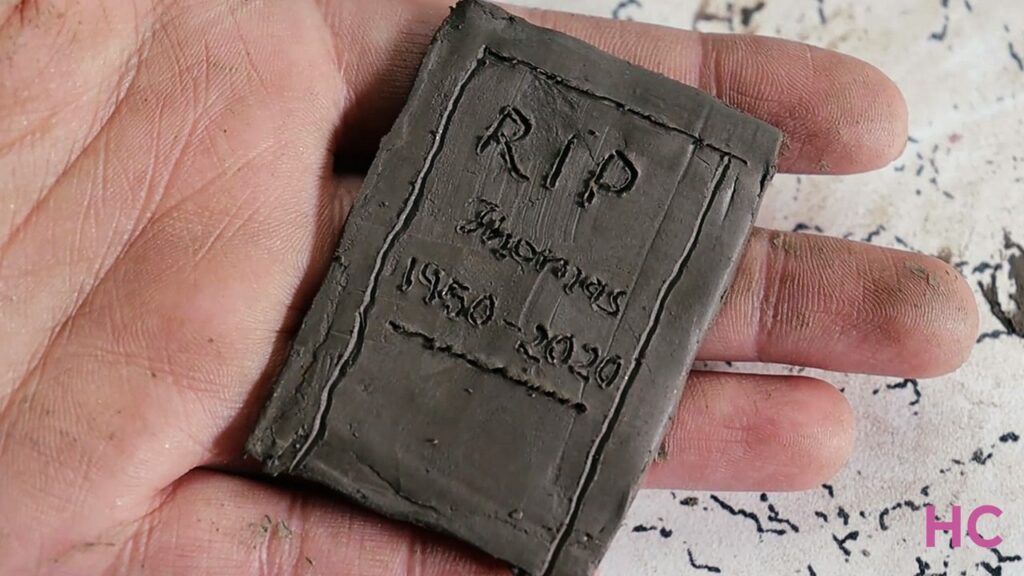
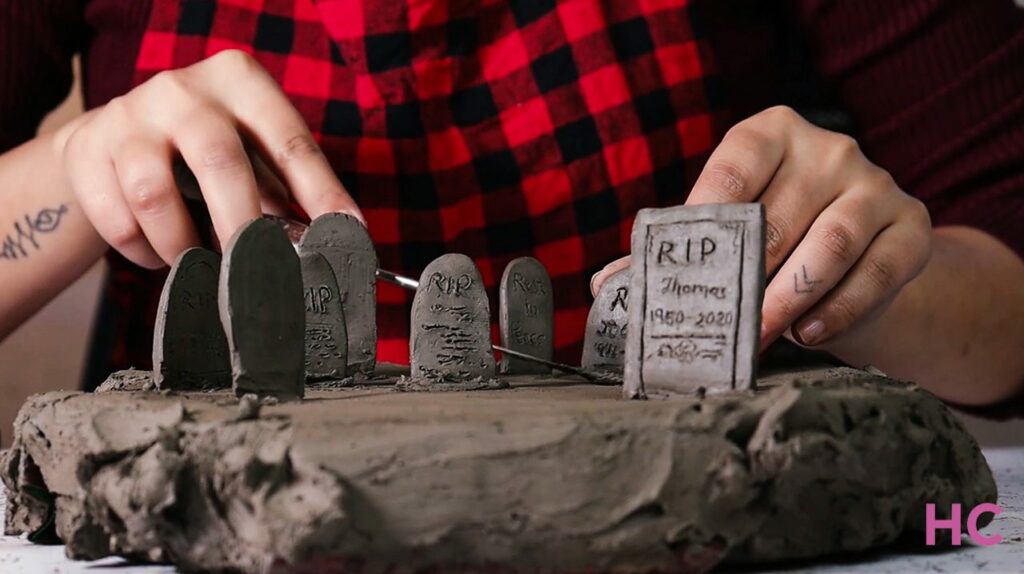
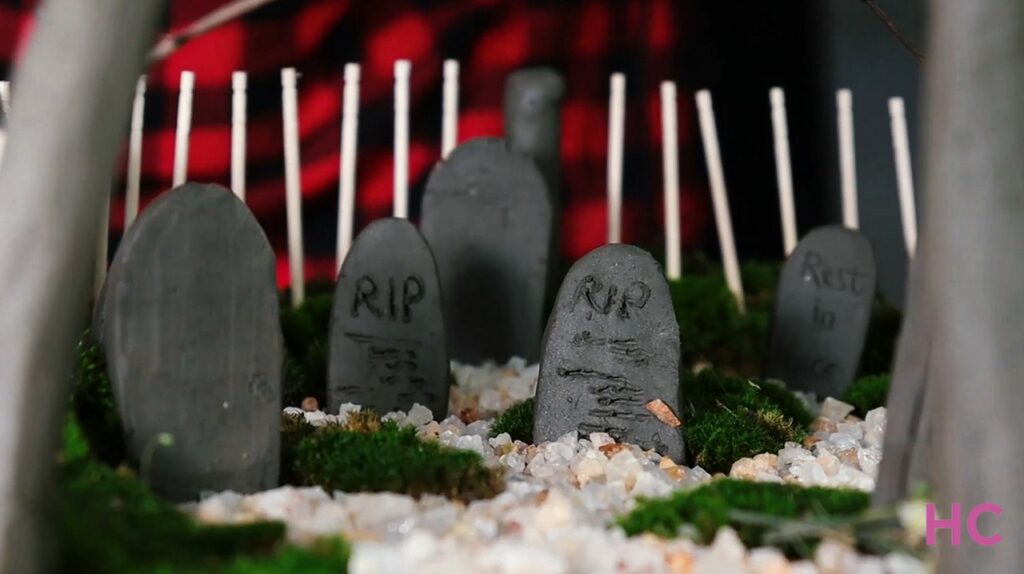
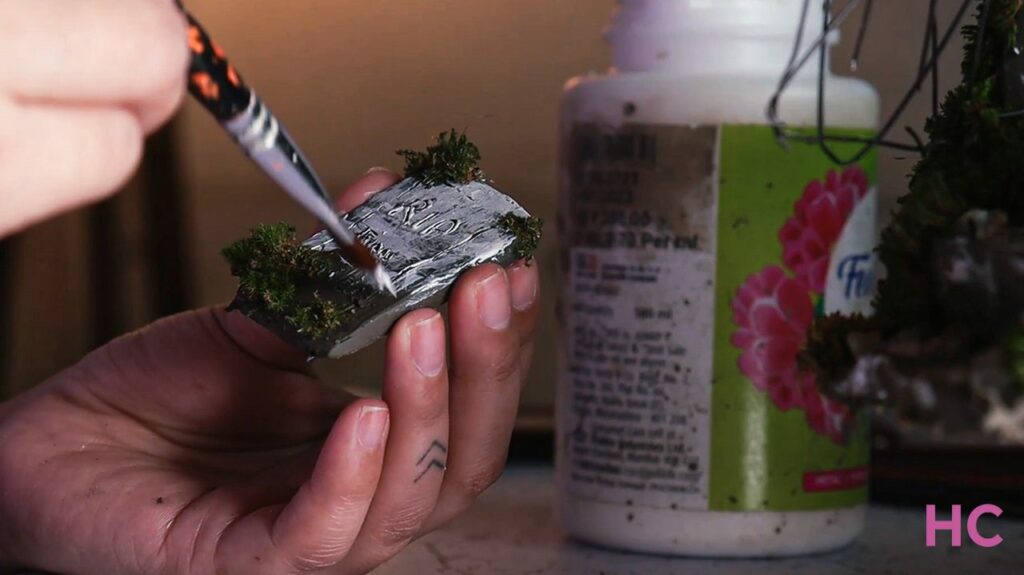
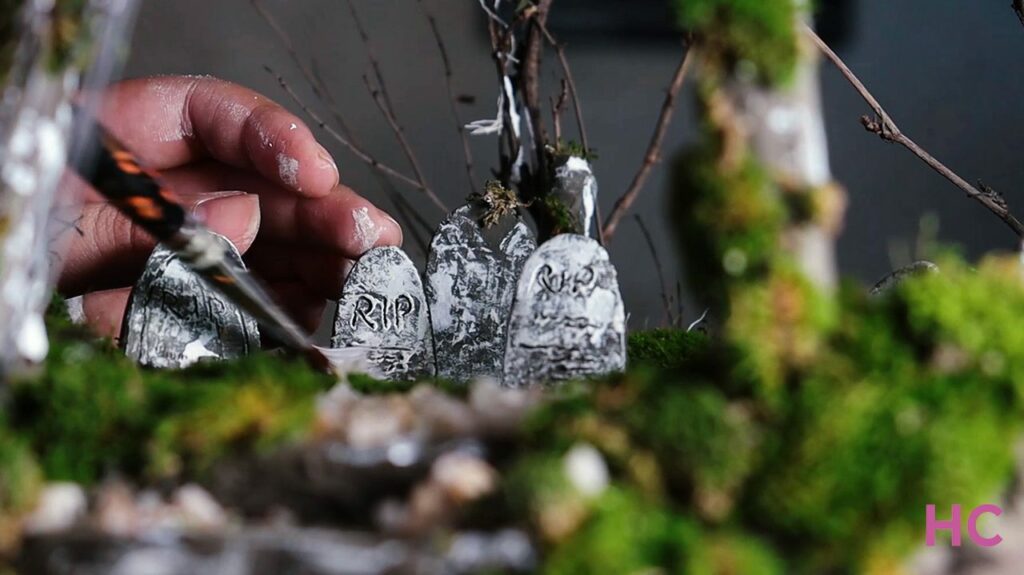
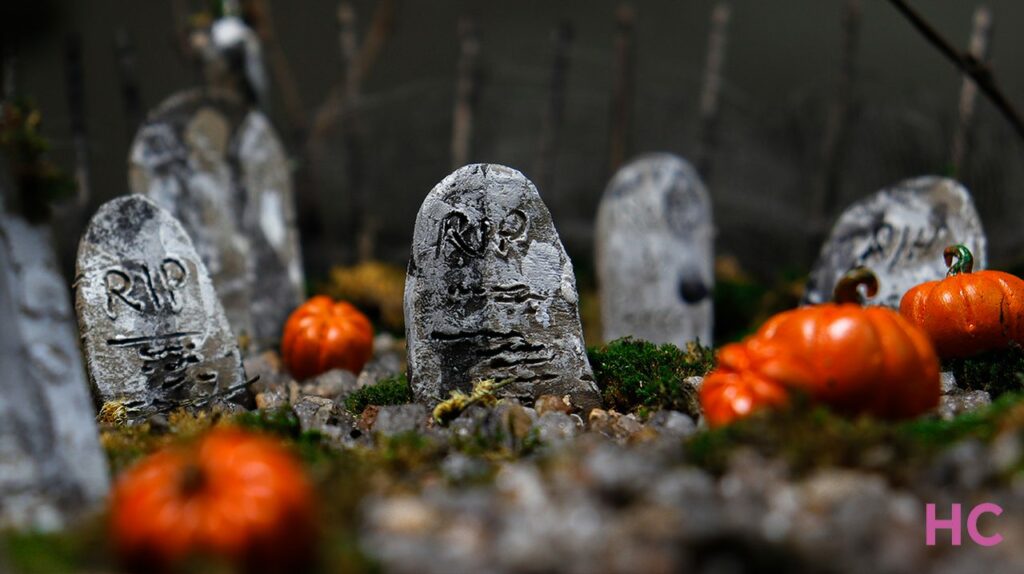
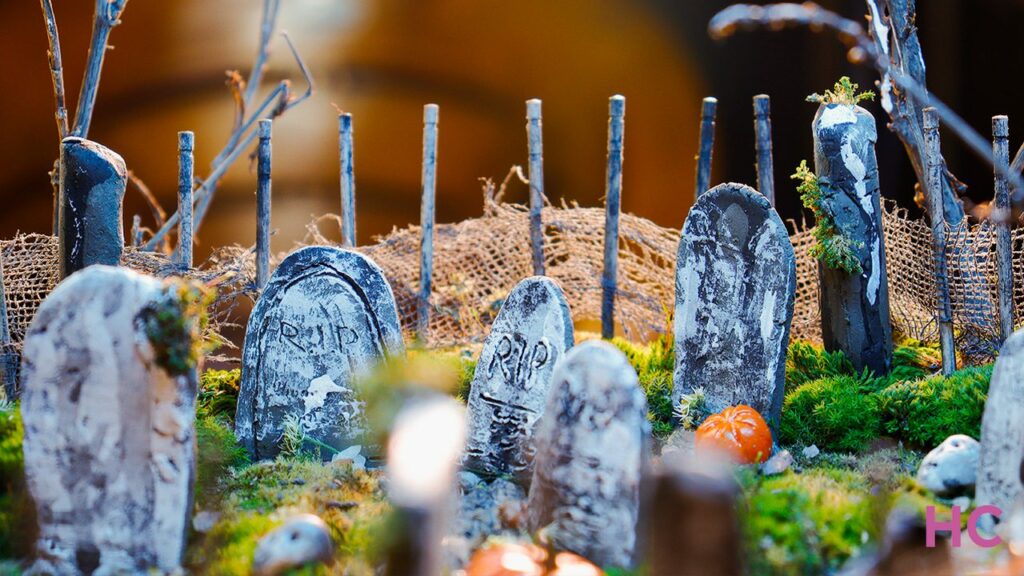
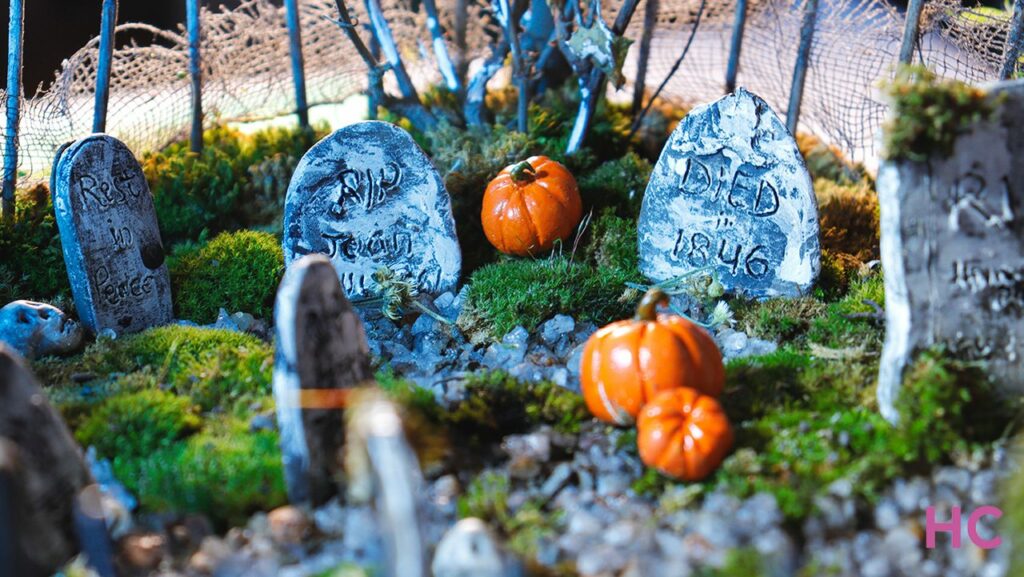
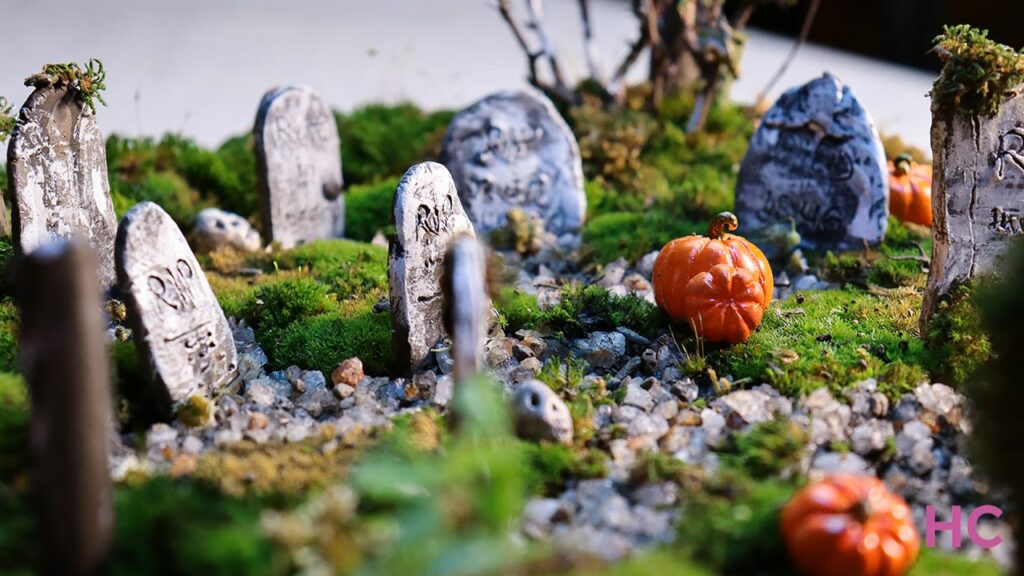
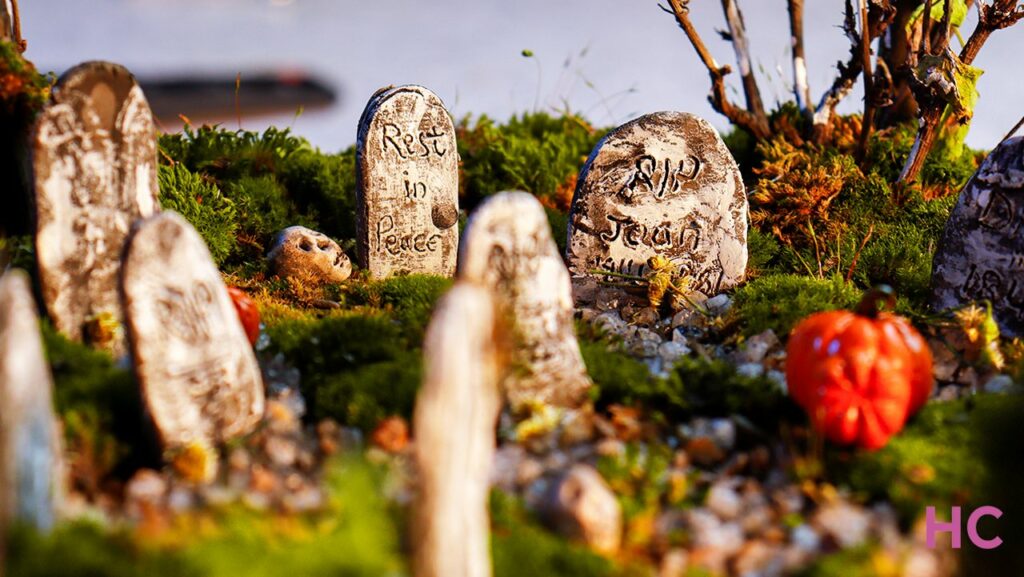
Step 4: Take small portions of clay and flatten them with a rolling pin. Cut out squares, rectangles, or other desired shapes to form tombstones for the graveyard. Use a needle or toothpick to engrave the tombstones with names and other details. It’s helpful to wrap craft wire around the tombstone clay for easier placement in the cemetery ground. Arrange these tombstones sporadically throughout the landscape.
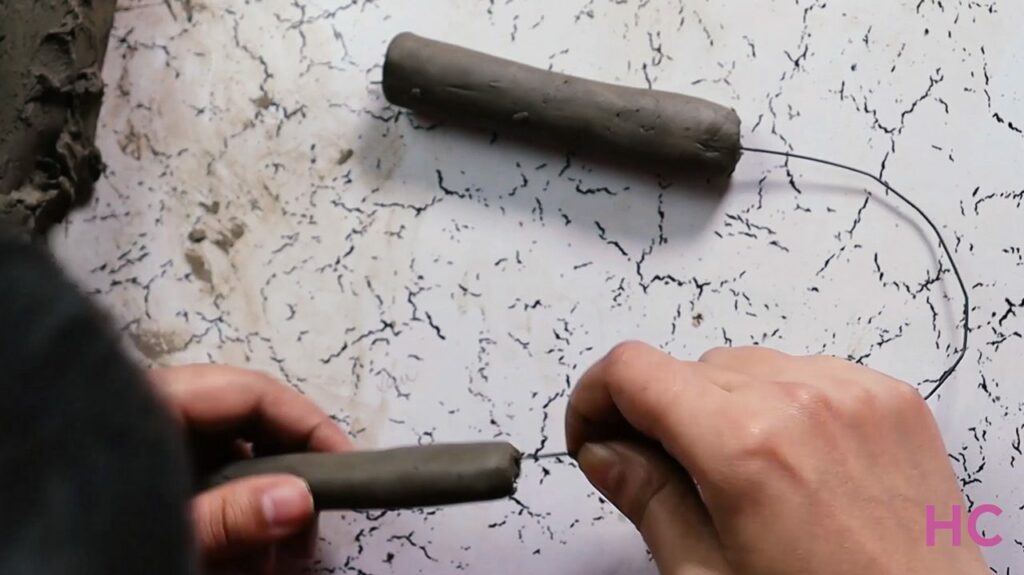
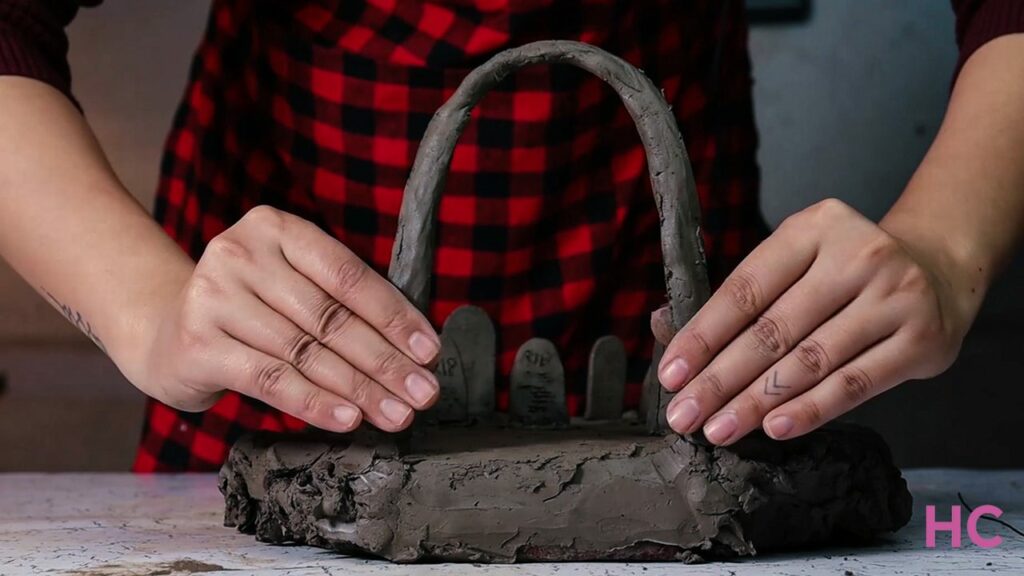
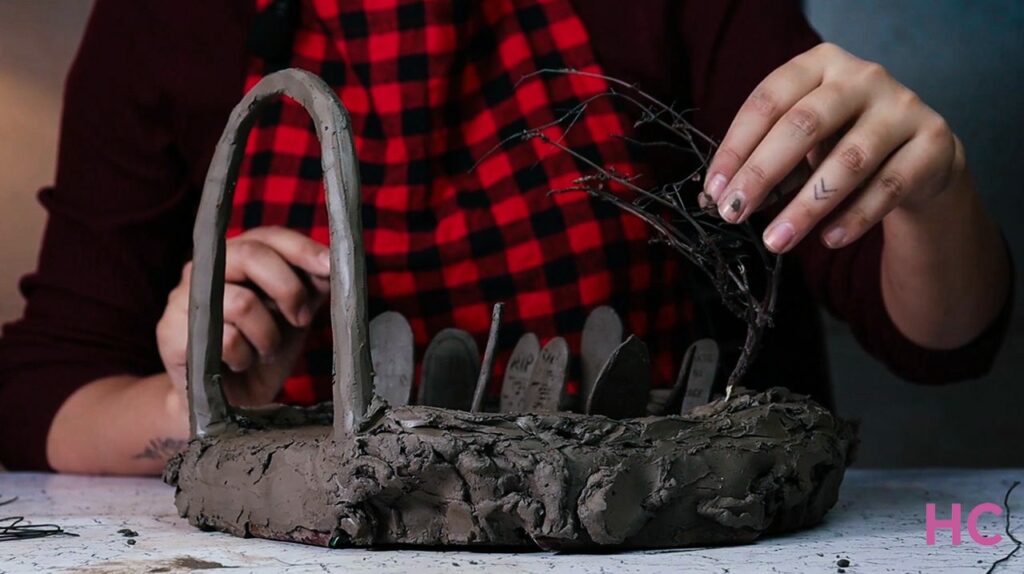
Step 5: Bend a piece of craft wire to make a long arch. Create two 5-inch-long cylinders, and stick this wire inside the clay, and position them at the entrance of the graveyard as the gate. Add more clay to completely cover the wire.
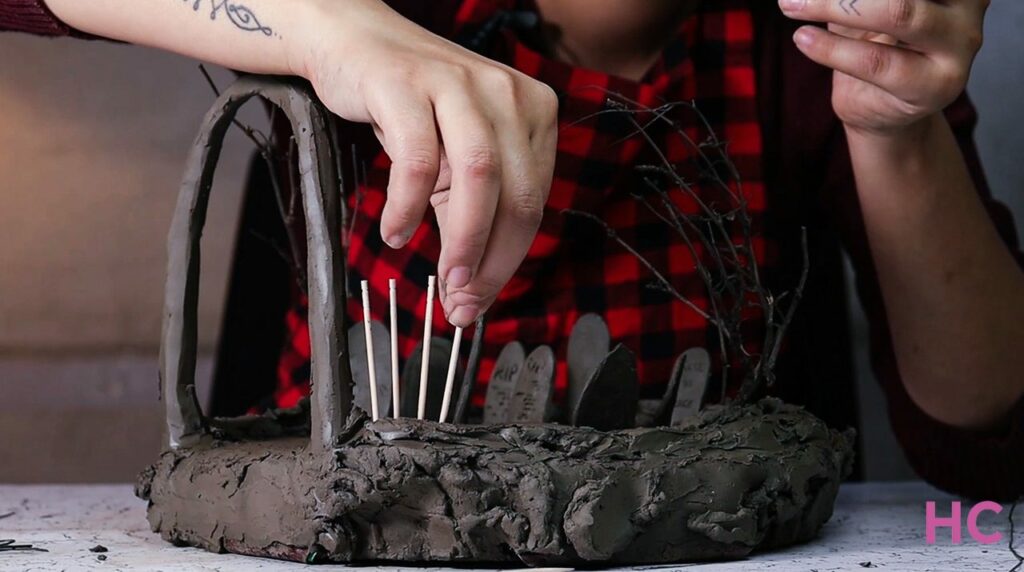
Step 6: Now, it’s time to add a fence to the cemetery. We used toothpicks and added a layer of bandage gauze for an authentic aged appearance. To enhance the weathered look, we soaked both the toothpicks and bandage gauze in diluted black paint before sticking them to the graveyard ground.
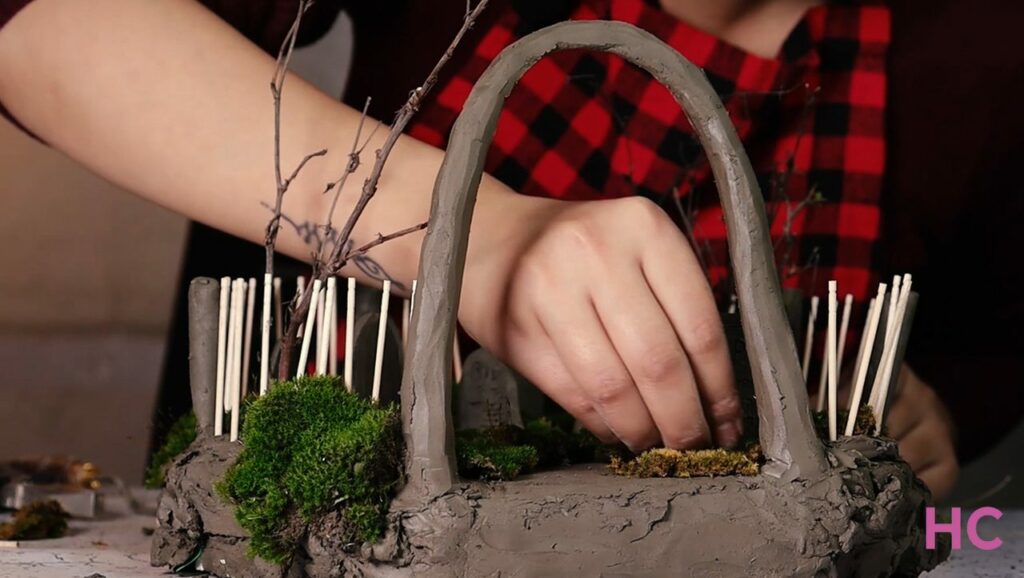
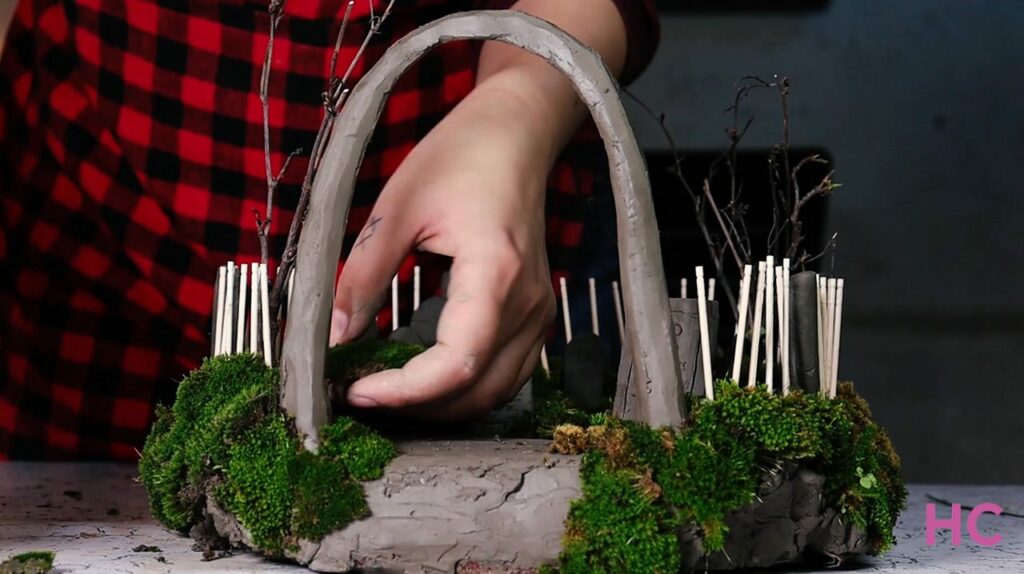
Step 7: Focus on landscaping by adding bits of fresh moss around the tombstones. Secure some moss on the headstones and the clay arch to create an ancient and eerie ambiance. Place moss along the sides, outside the fence, and on the steps leading to the cemetery.
Step 8: Attach dried branched twigs outside the fence to mimic trees. Ensure that the clay is thick enough (around the edges) to support the weight of the upright wooden pieces.
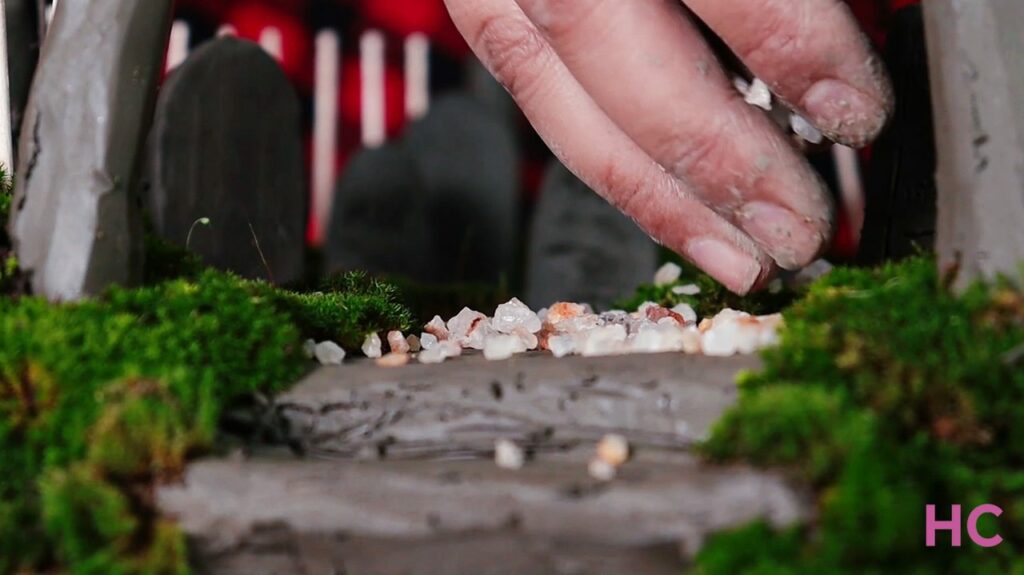
Step 9: Create small pieces of coarse stone to construct gravel walkways around the area. Then, fashion a gate door from craft wire and fix it to the clay-wire archway made earlier.
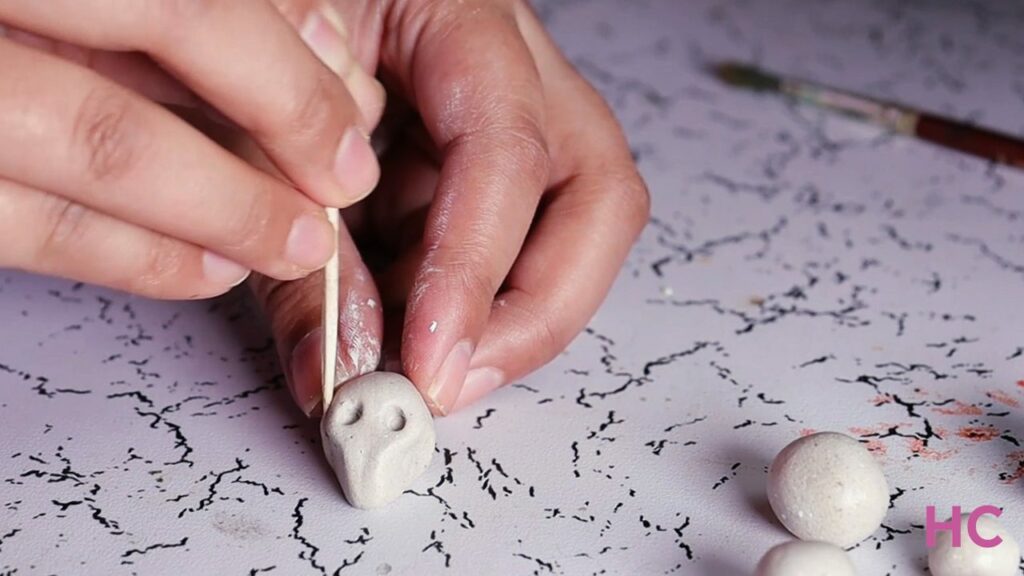
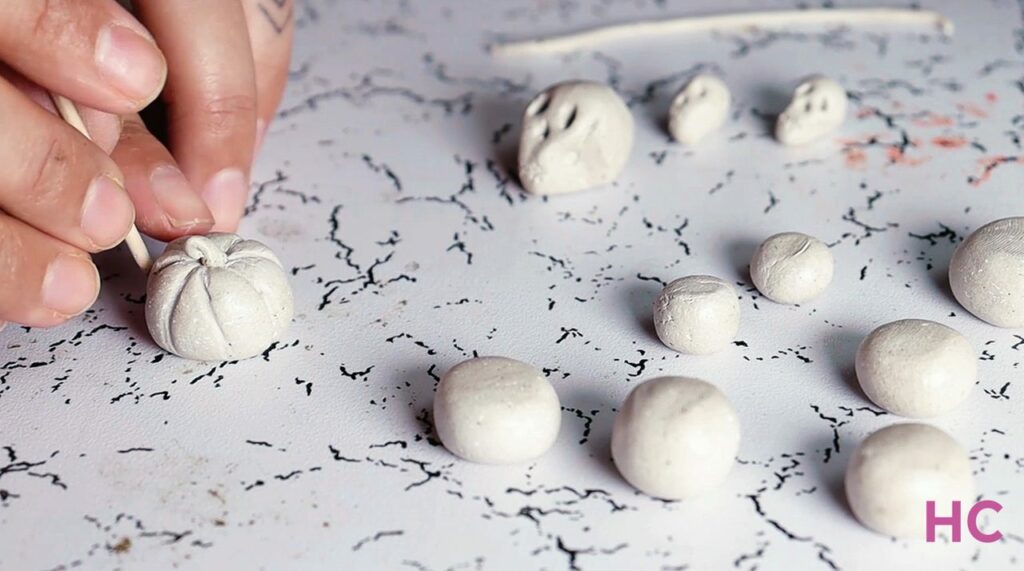
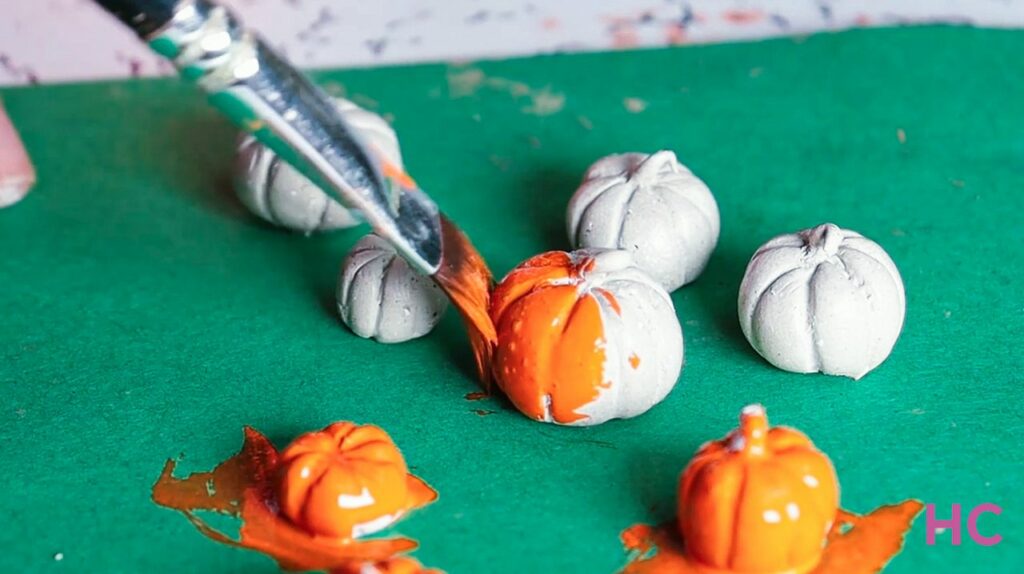
Step 10: Take some more clay to make miniature skulls and pumpkins and paint them to mimic the real. Place one skull on top of the gate and scatter the remaining skulls and pumpkins throughout the miniature graveyard scene to add color and create a truly spooky vibe.
Also Read: I Made 5 Clay Candle Holders You can Easily Replicate for Halloween
There you have an inexpensive and easy-to-make miniature graveyard for Halloween decorations. You can use it in your Halloween village or Halloween town setup if you are creating one. Or simply make it a centerpiece anywhere in your house.
Here is the full video tutorial for this DIY Graveyard for Halloween. Let us know if you give it a try. Happy Halloween folks!