
Farmhouse range hood covers are decorative wooden structures installed over a standard vent hood built to conceal the metal vent above the kitchen stove. While the store-bought range hood covers are quite expensive (ranging somewhere between $500 to $2,000), a self-built cover will save you a ton of money.
You can customize the handmade vent hood cover to match your kitchen’s design and add a lovely farmhouse charm to its interior. If you love DIY projects and want to transform your kitchen, here is an easy tutorial on how to build a farmhouse range hood cover, and that too on a budget.
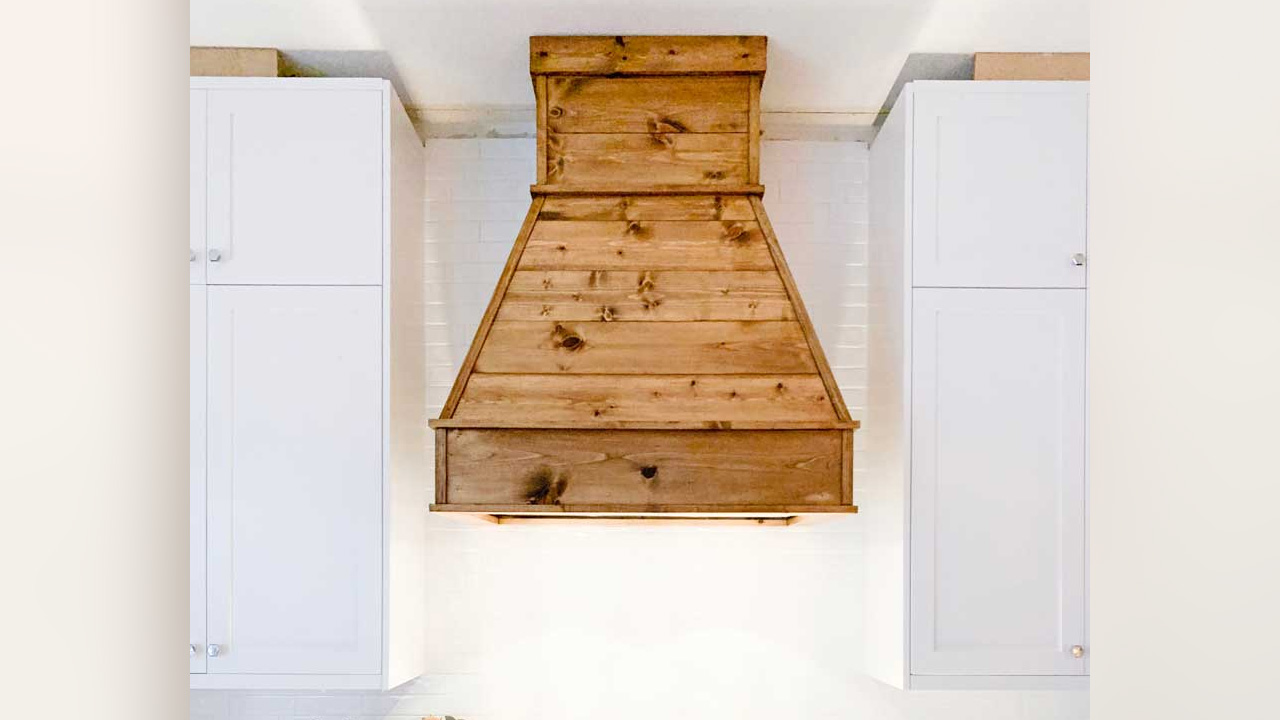
The DIY Farmhouse range hood cover by Stacy will add rustic elegance to your kitchen with its decorative centerpiece appeal. You can add a protective cover to your vent hood and boost your kitchen’s aesthetics for under $200.
Tools You’ll Need:
- Compound Miter saw
- Table saw
- Nail gun
- Air compressor
- Angle finder
- Tape measure
- Stud finder
- Level
- Tack cloth
Materials Required:
- 2 x 4 lumber
- 1 x 8 boards
- 1 x 6 boards
- 1 x 4 boards
- 1 x 2 boards
- Corner molding
- Range hood vent insert
- Vent ducting
- Wood screws and brad nails
- Wood glue
- Caulk
- Wood conditioner and wood stain
- Polycrylic protective finish
How to DIY Farmhouse Range Hood Cover
Plan Design
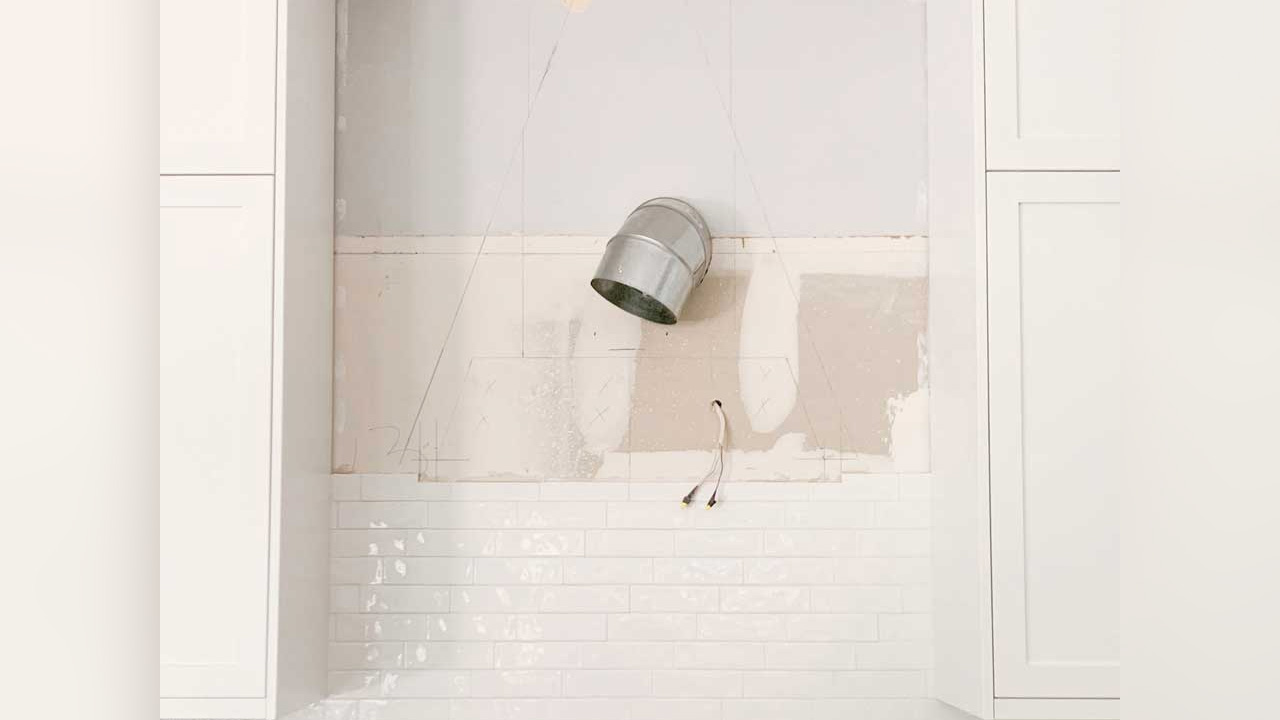
The first step is to decide how high you want your vent hood insert above the stove. Now use a cardboard template to trace the shape of the vent insert and draw it directly onto the wall to determine the exact dimensions and size. Install the backsplash tiles up to the bottom of the hood.
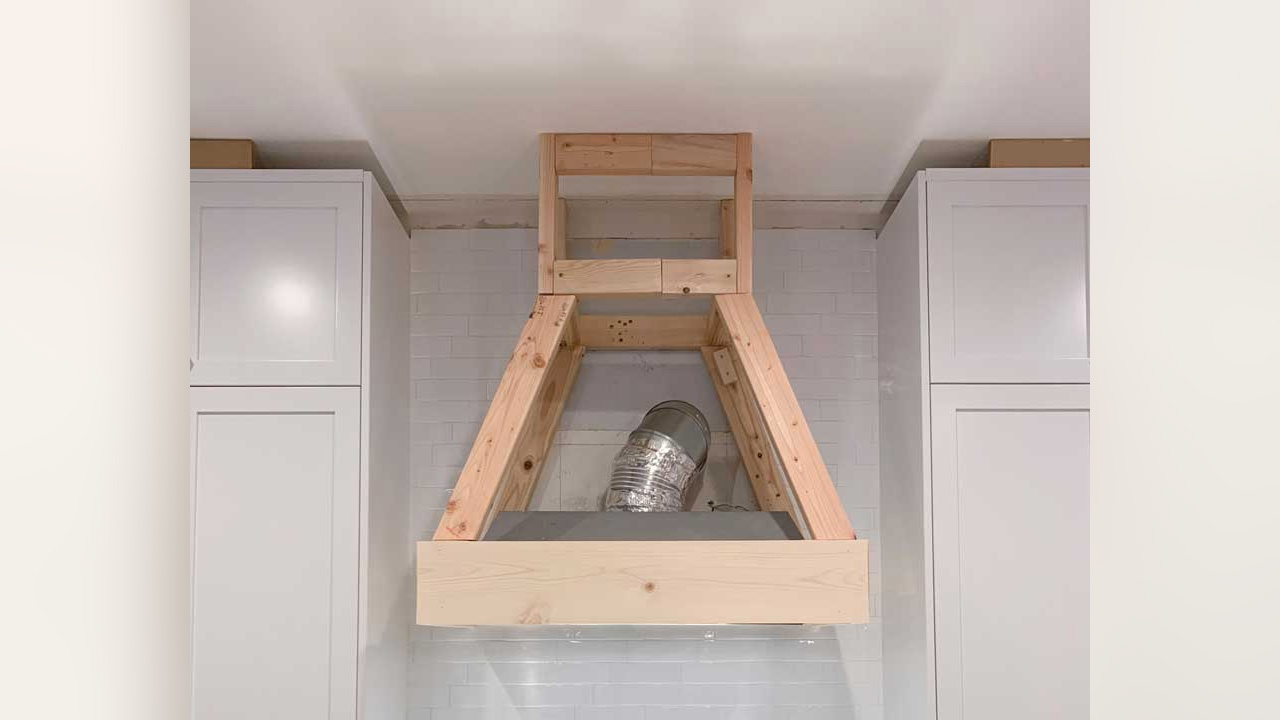
Build Farmhouse Vent Hood Cover Frame
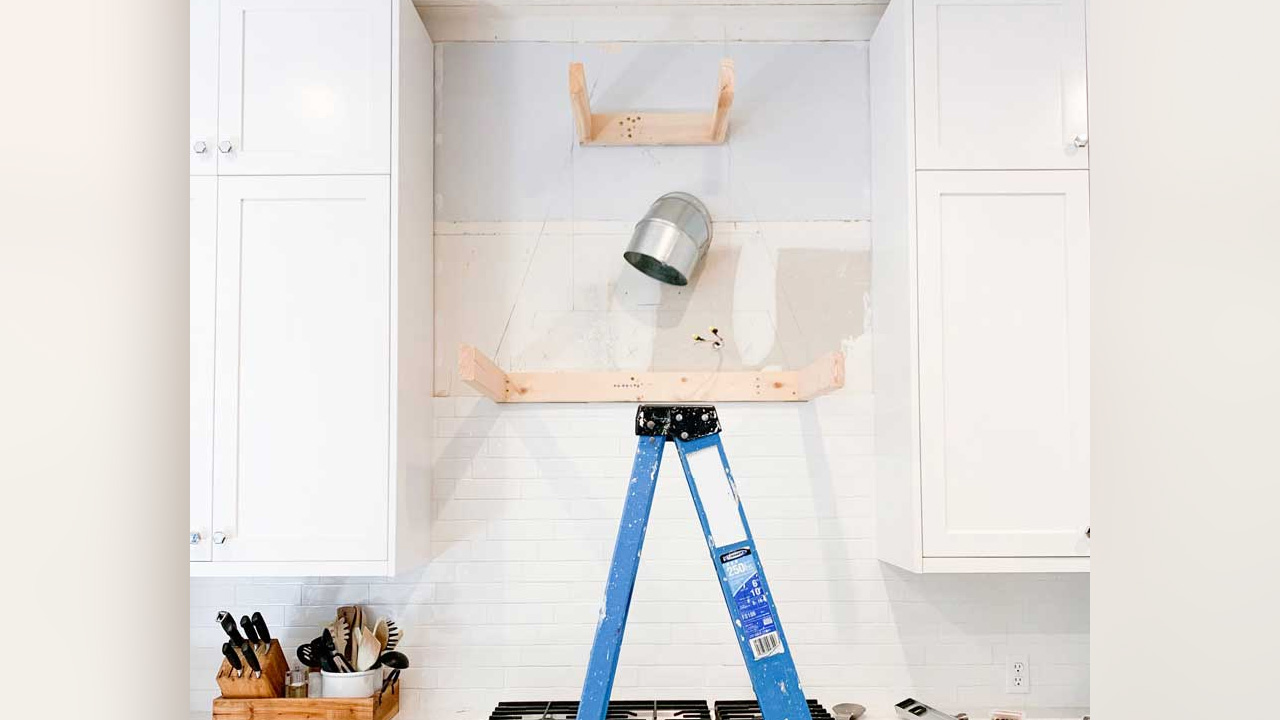
Once you have finalized the dimensions, build a frame to attach the wooden cover boards. The wooden support brackets create anchor points for the hood structure and provide mounting support to the framework later. This step lays the foundation for the vent hood cover.
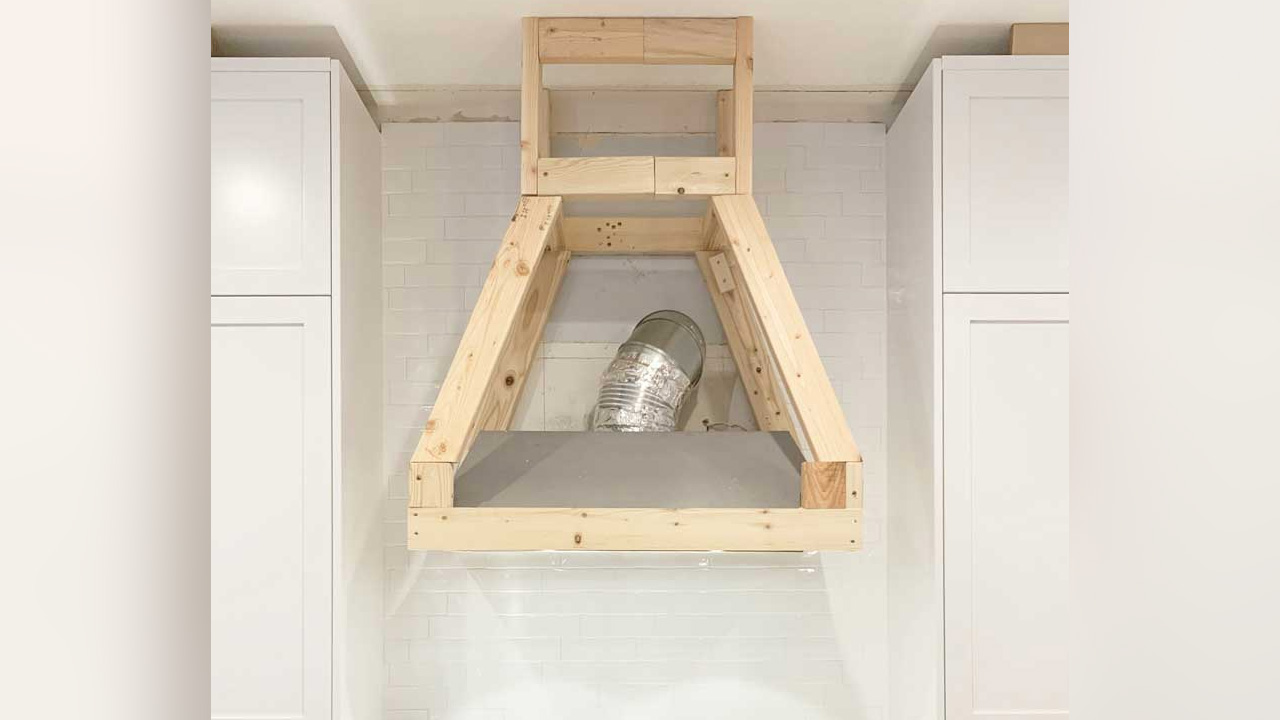
Build Skeletal Structural Frame
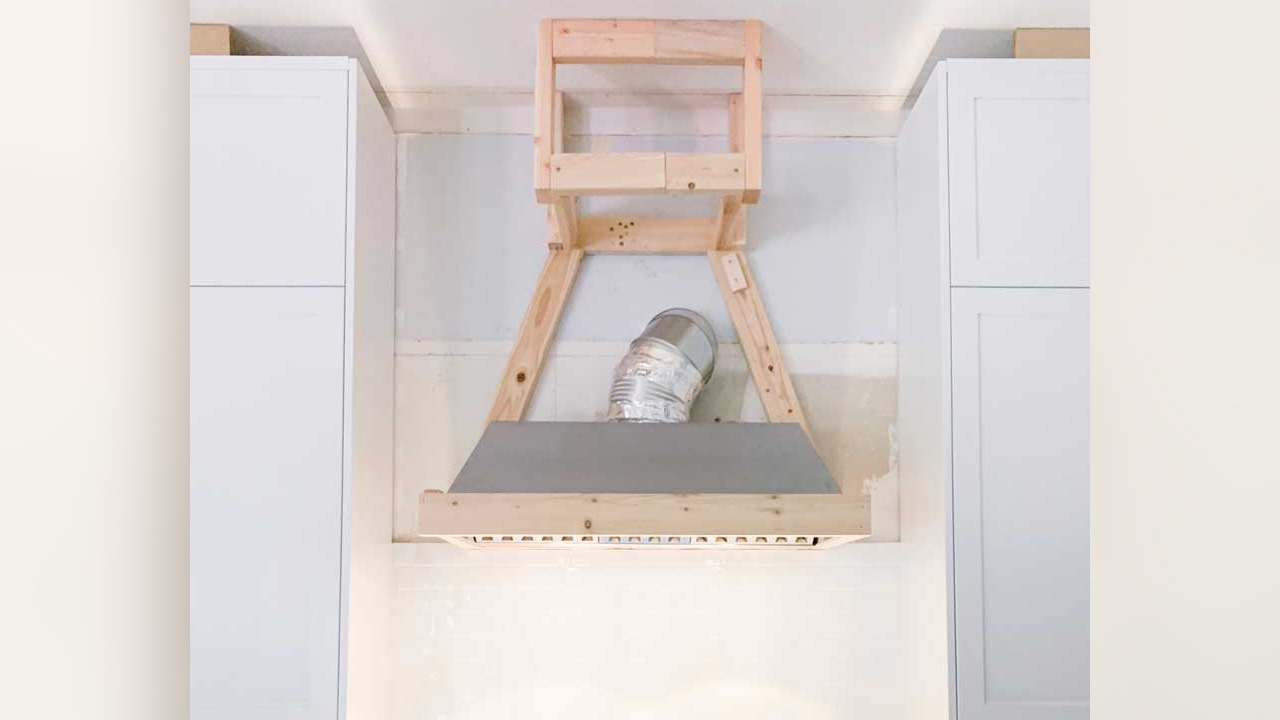
The skeletal structural frame consists of three 2×4 boxes connected by more 2x4s. The bottom box frame will surround the vent insert, while the top box frame will form the chimney section. The angled wooden supports form the sloped side. Now connect the vent insert and duct to the flexible tube.
Finish Tile Work and Prepare Wood Boards
Before covering the frame, finish the tile backsplash behind the hood and the angular frame. After that, bring the wooden boards, sand them with 120-grit, and then 220-grit sanding paper. This process will smooth the lumber and make the staining process effective. Thoroughly clean the boards with a damp paper towel and tack cloth to remove the dust.
Build Base of Range Hood Cover
To build the base of the range hood cover, start at the bottom and move upward. Cut a 1×8 board for the front base, measured according to the width of the hood base, and cut a 1×2 side board for the left and right edges. Now, miter cut these pieces at 45-degree angles to form perfect angled corners once joined.
Attach Boards With Brad Nailer
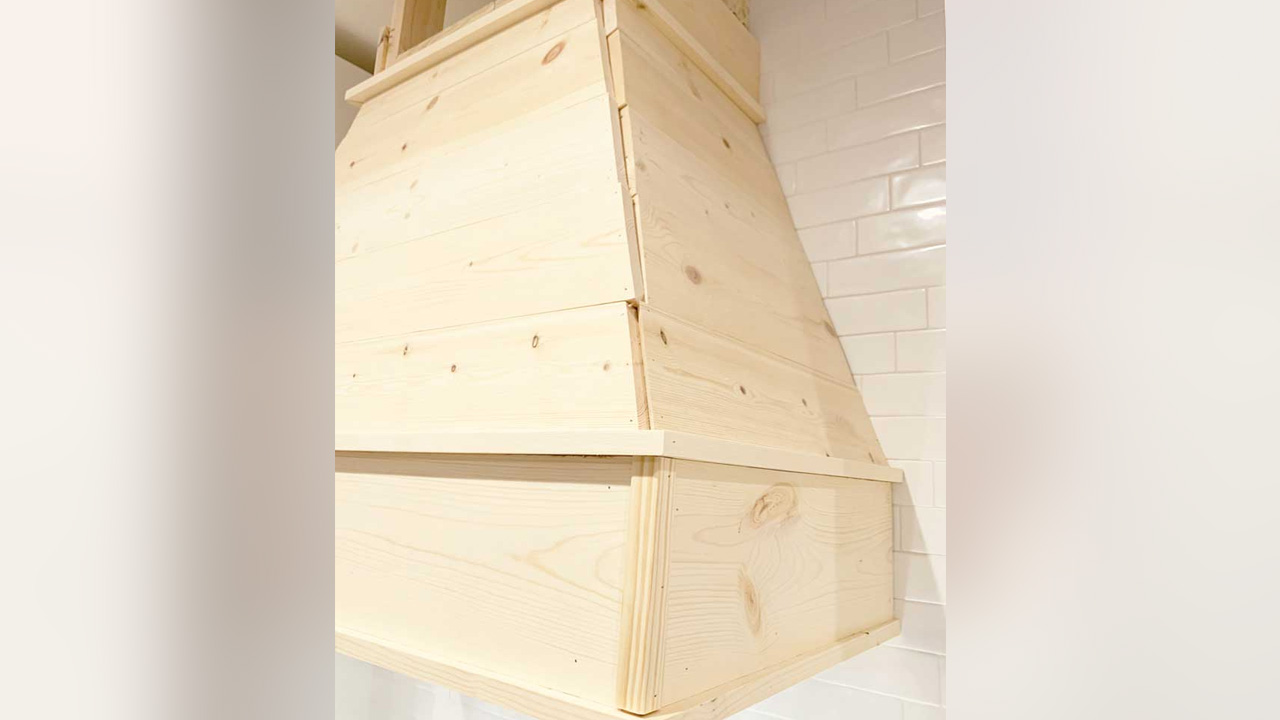
Attach the boards to the frame using a brad nailer to lock them securely to the wooden frame, forming the base trim. Now place a 1×2 board horizontally above the base to define the shape of the vent hood.
Build Angled Hood Body
This is the most important and difficult step in this tutorial, forming the middle section of the hood cover. You will need an angle finder to measure the frame’s angle. After that, cut the bottom of the 1x 6 boards with a miter saw and install them vertically. Position each part carefully and attach it using brad nails. After completing this step, you’ll notice that your hood cover has a wide decorative base.
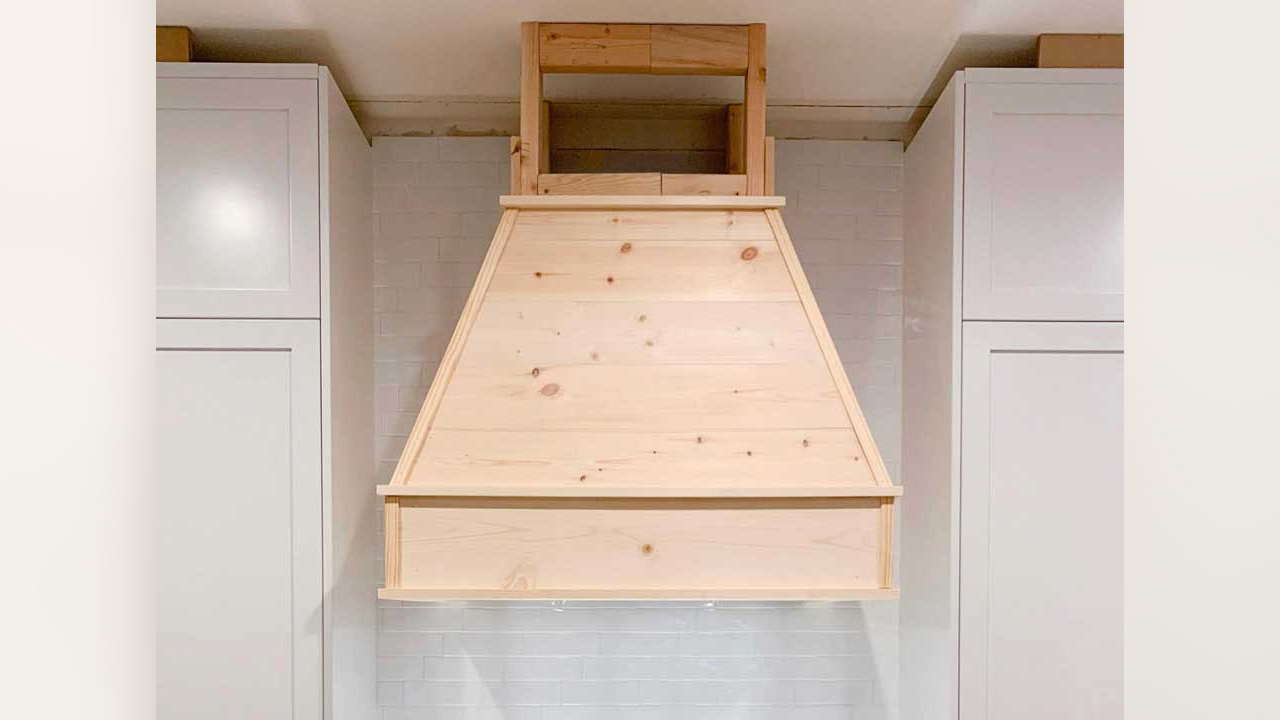
Build Chimney Section
Measure the height of the chimney section and cut 1 x 6 shiplap boards. The shiplaps will enhance the farmhouse aesthetic. Now install the boards on the front and sides by aligning them without leaving any gaps. Add a crown trim using 1 x 4 boards and wrap around all three edges of the chimney section.
Finish the Underside
To make the hood cover look finished from the underside, attach 1 x 2 boards alongside the wall and cut another 1 x 4 board to complete the remaining part. Use nails to attach them securely. Install trim to cover the seams, and make sure not to nail too close, or it will split.
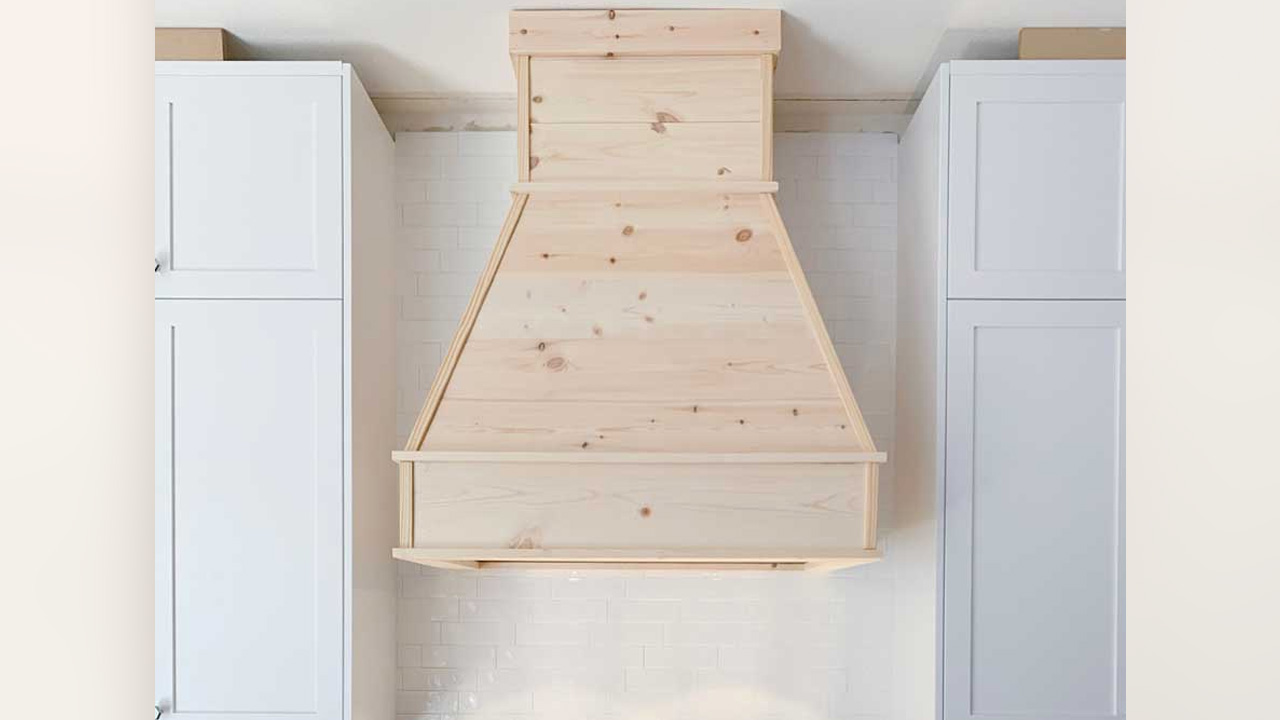
Apply Wood Stain
Before staining the hood cover, apply a coat of Minwax conditioner and let it sit for around 15 minutes, and then apply a layer of Minwax stain in classic grey. This process will help remove the redness of wood. After this, add another layer of Minwax Provincial and stain your hood cover. Apply a coat of stain and wipe it off after 10 minutes to prevent a dark tone. Now finish the staining by applying three coats of ultra-flat polycrylic protective coat to seal the wood.
Final Word
This creative DIY is cheaper compared to store-bought options, and the best part is the endless customization. The vent hood DIY allows design freedom where you can change its trim shape, use different wood or stain to match cabinetry and walls. The hood cover easily matches various kitchen aesthetics, such as rustic, traditional, minimalistic, or farmhouse.
Follow Homecrux on Google News!


